hi @dirtyhippie and welcome. I’ve used 330 on the X (350 will fit) and anywhere from 330 - 400 on the Y
I used 350mm it works…for now.
@stewart, as you know, I’m newer than new when it comes to this…I managed to print all the parts and is waiting for my hotend to arrive. Is there anything special I need to do? Is upgrading the hotend is as simply as unplug the old one and put in the new one? I meant “simply” is just to use the OEM’s soldering/slots for the stock hot end. Any new soldering, etc I need to do?
Thanks!
depends on the hot end. worst case scenario is splicing wires, which you can solder or twist together and cover with heat shrink tubing. splicing says you the trouble of removing and replacing wires all the way back to the control board, which is a pain.
We’ve printers running E3D Titan Aero with Vulcano, will try to see if it will work nicely on the CR-30. Any cons except the increased weight to add direct drive to the CR-30? We’ve already added linear rails and that improved the printers reliability a lot. Im mostly doing this upgrade to support more solid prints in bigger line heights.
Will come back in a few days once I get a test piece out.
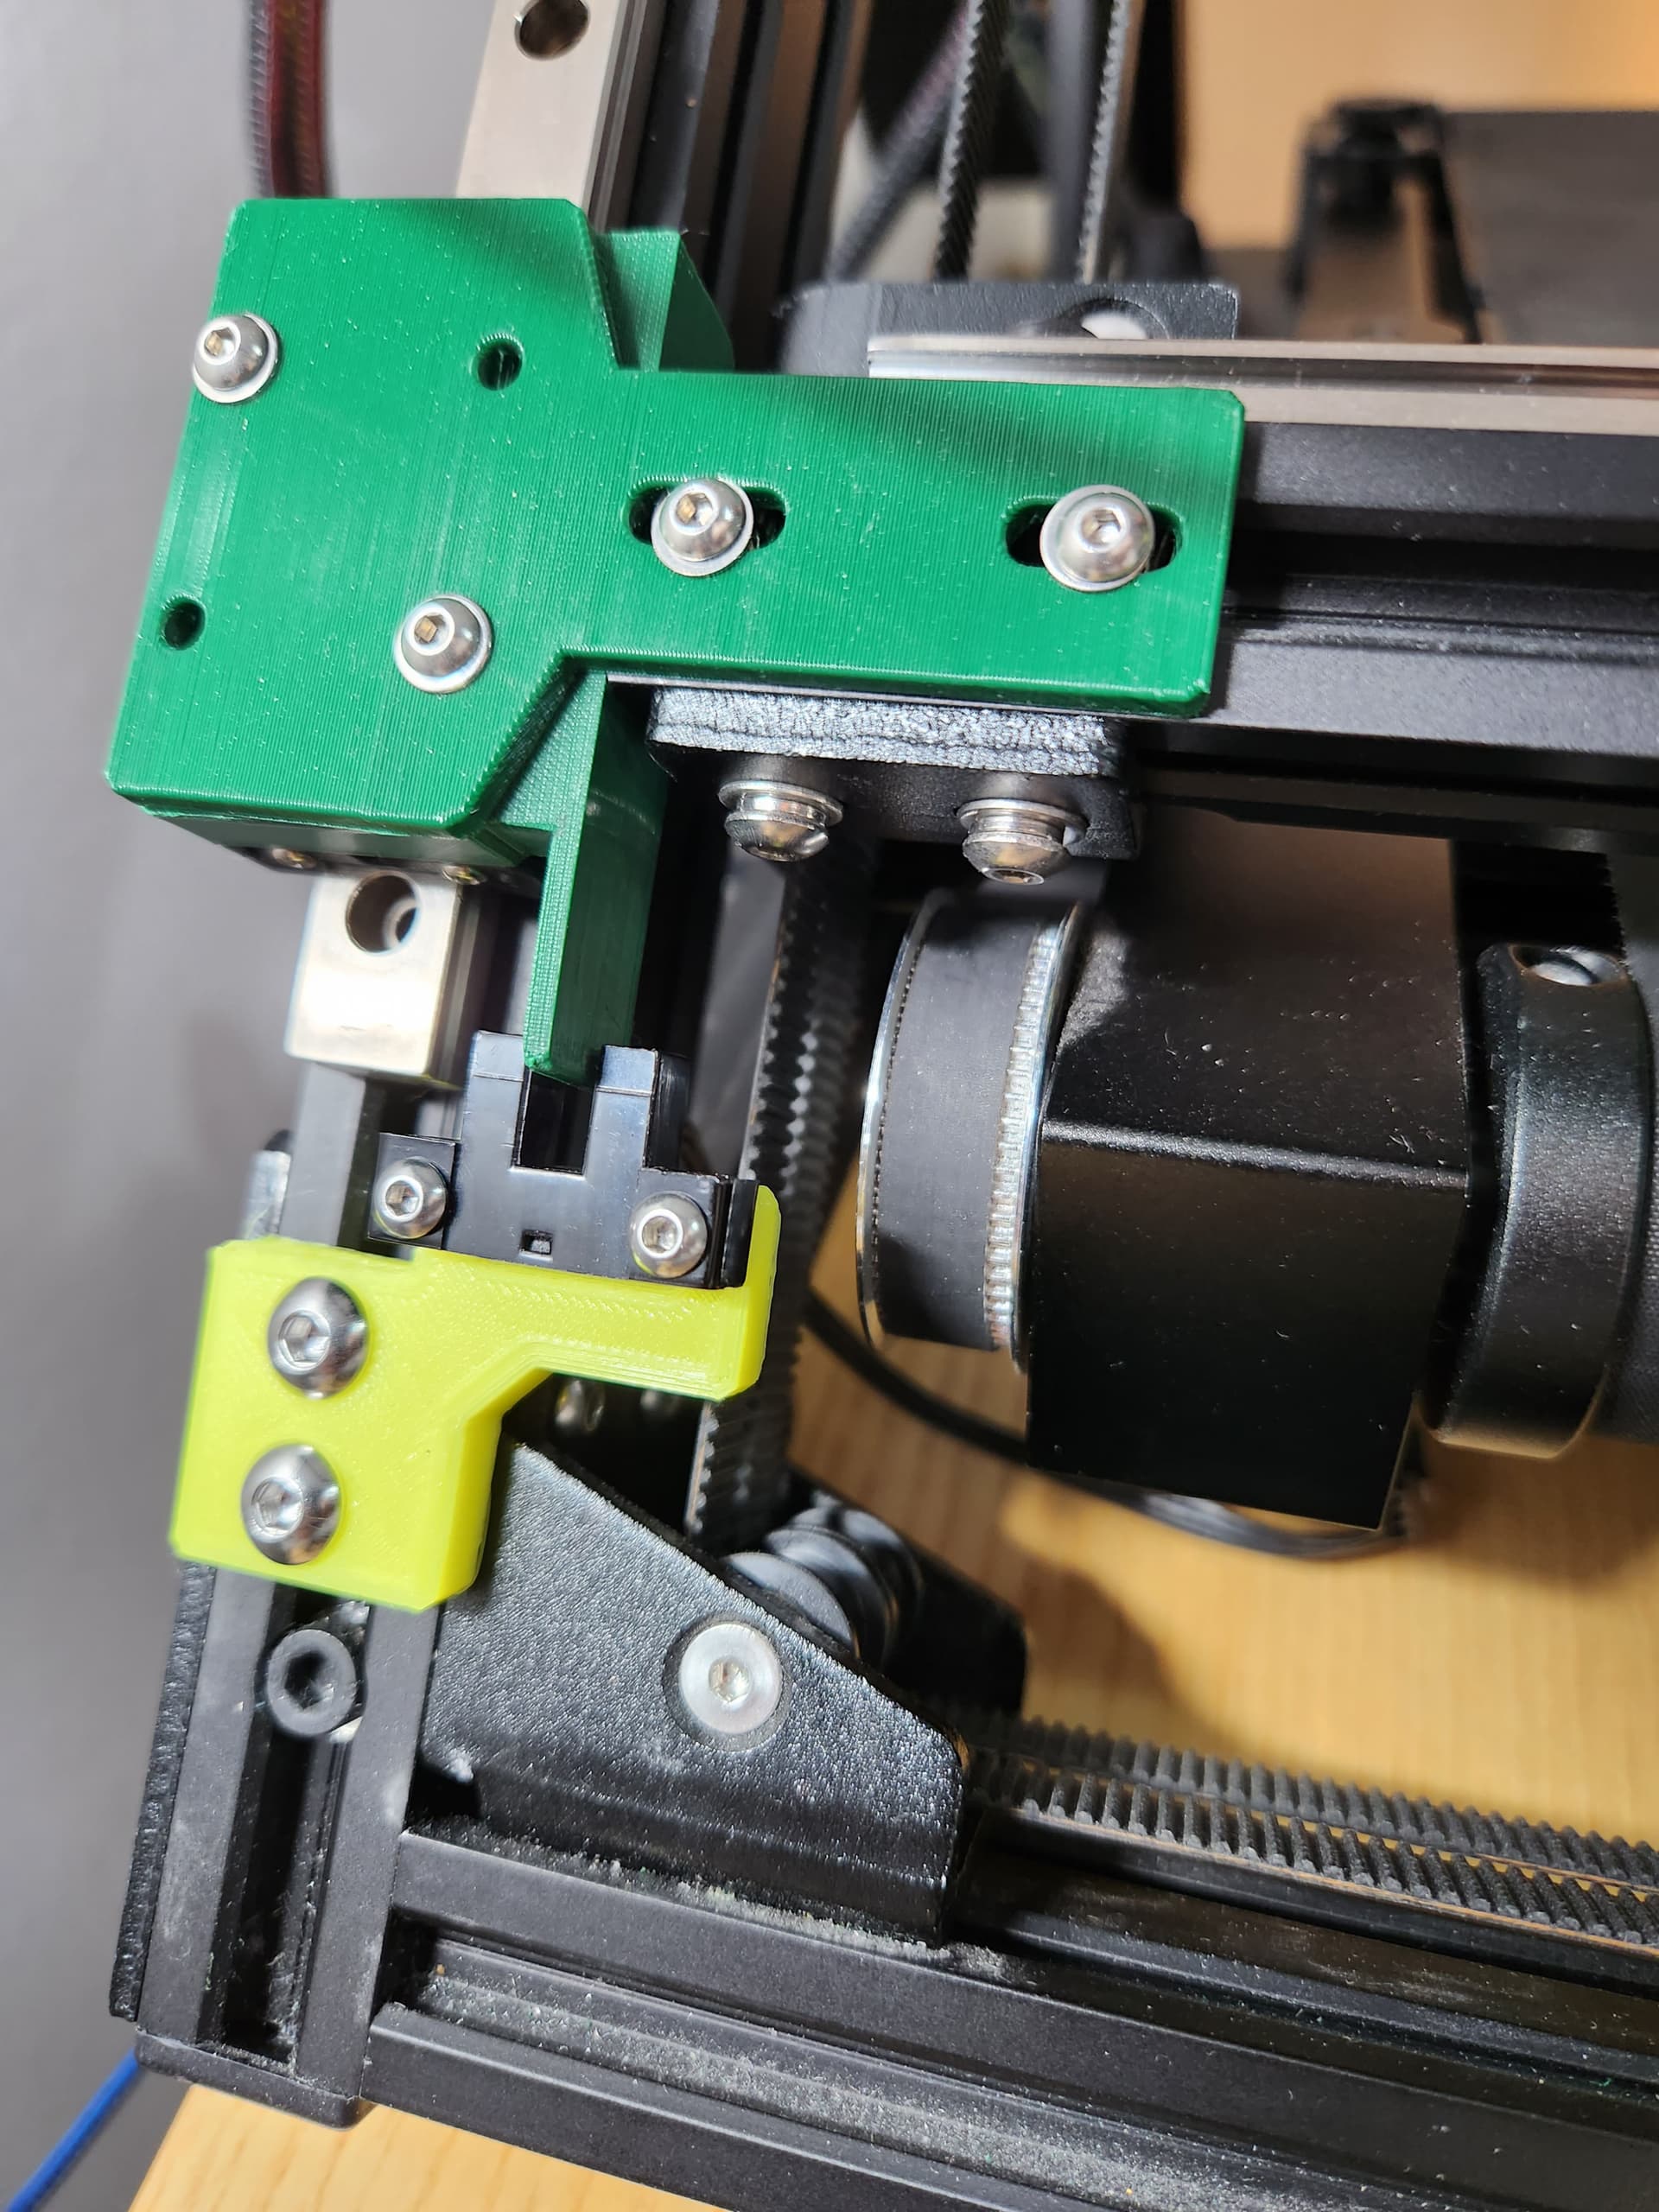
Hi @Jesper and welcome. I have not yet put a direct drive on the CR-30. Karl Brown is sending me a conversion kit with an Orbiter 2.0 that I will be testing soon.
There’s a problem with the E3D Titan Aero and mounting it at a 45c degree and that’s that the stepper motor will hit the bed before the nozzle is even close. Right now I’m trying to mount it with a 90-degree rotation and see how that works. Otherwise, mounter a supervolcano will fix the first problem.
However, what’s your solution for making the nozzle able to perform at a 45-degree angle? So the actual tip hits the bed before the “nut”. Right now I’m thinking of filing the nut on the nozzle down. Look at the attached illustration.
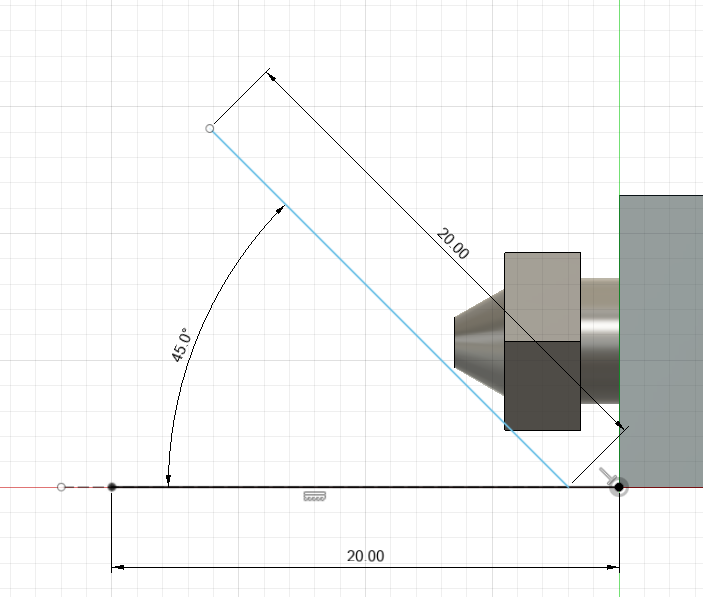
I upgraded my setup using this kit, which is no longer available. But I have found similar nozzles and kits on aliexpress. Filing the nut is tricky to get right with tightening. On the other side, f you extend the nozzle seating, then the heat break will be too far into the heated block and not provide a needed thermal barrier.
Thank you, just finished the linear rail on the x axis and first go around has been pretty good. I did rig it to fit by drilling holes in original plate to mount on the carriage. Time will tell if the offset the belts are experiencing will affect anything. Thank you so much for all this hard work you have done. Eventually ill get around to replacing the stock board and stock hotend. Has anyone looked to see if the creality highflow spider or something like the dragonfly hot end will work?
1 Like
Hi there , do you have the STL for the board mount or the drawings for it
regards Ulrik
Wow, this is really nice. Following your progress and thank you. I have a CR30 with x linear rail and direct drive. I really want to get klipper installed. Any special settings while setting up the firmware or in the slicer to note specific for the belt printer? Can I start using Superslicer instead of Ideamaker? Thank you!
Hey Steward and everyone, thanks for posting all of this. Its been an invaluable education. I’m trying to get a stack of CR-30s working for small-scale manufacturing. One of the challenges remaining is printing on the belt. I’m wondering if you’ve experimented with any other surface.
Looking around I saw that the White Knight used a coated steel belt and that sounded like a sensible idea. Any thoughts about that? BTW, what every happened to that project, it seems to have fallen by the wayside which is curious considering how much energy there is in modifying the CR-30.
Cheers
-Ed
Hi @EdB and welcome. I haven’t tracked CR-30 development recently. Have you checked the belting printing Discord or looked on Twitter? I know there has been some experimentation with newer belts and materials. And some people have had success with the stock belts depending on the filament.
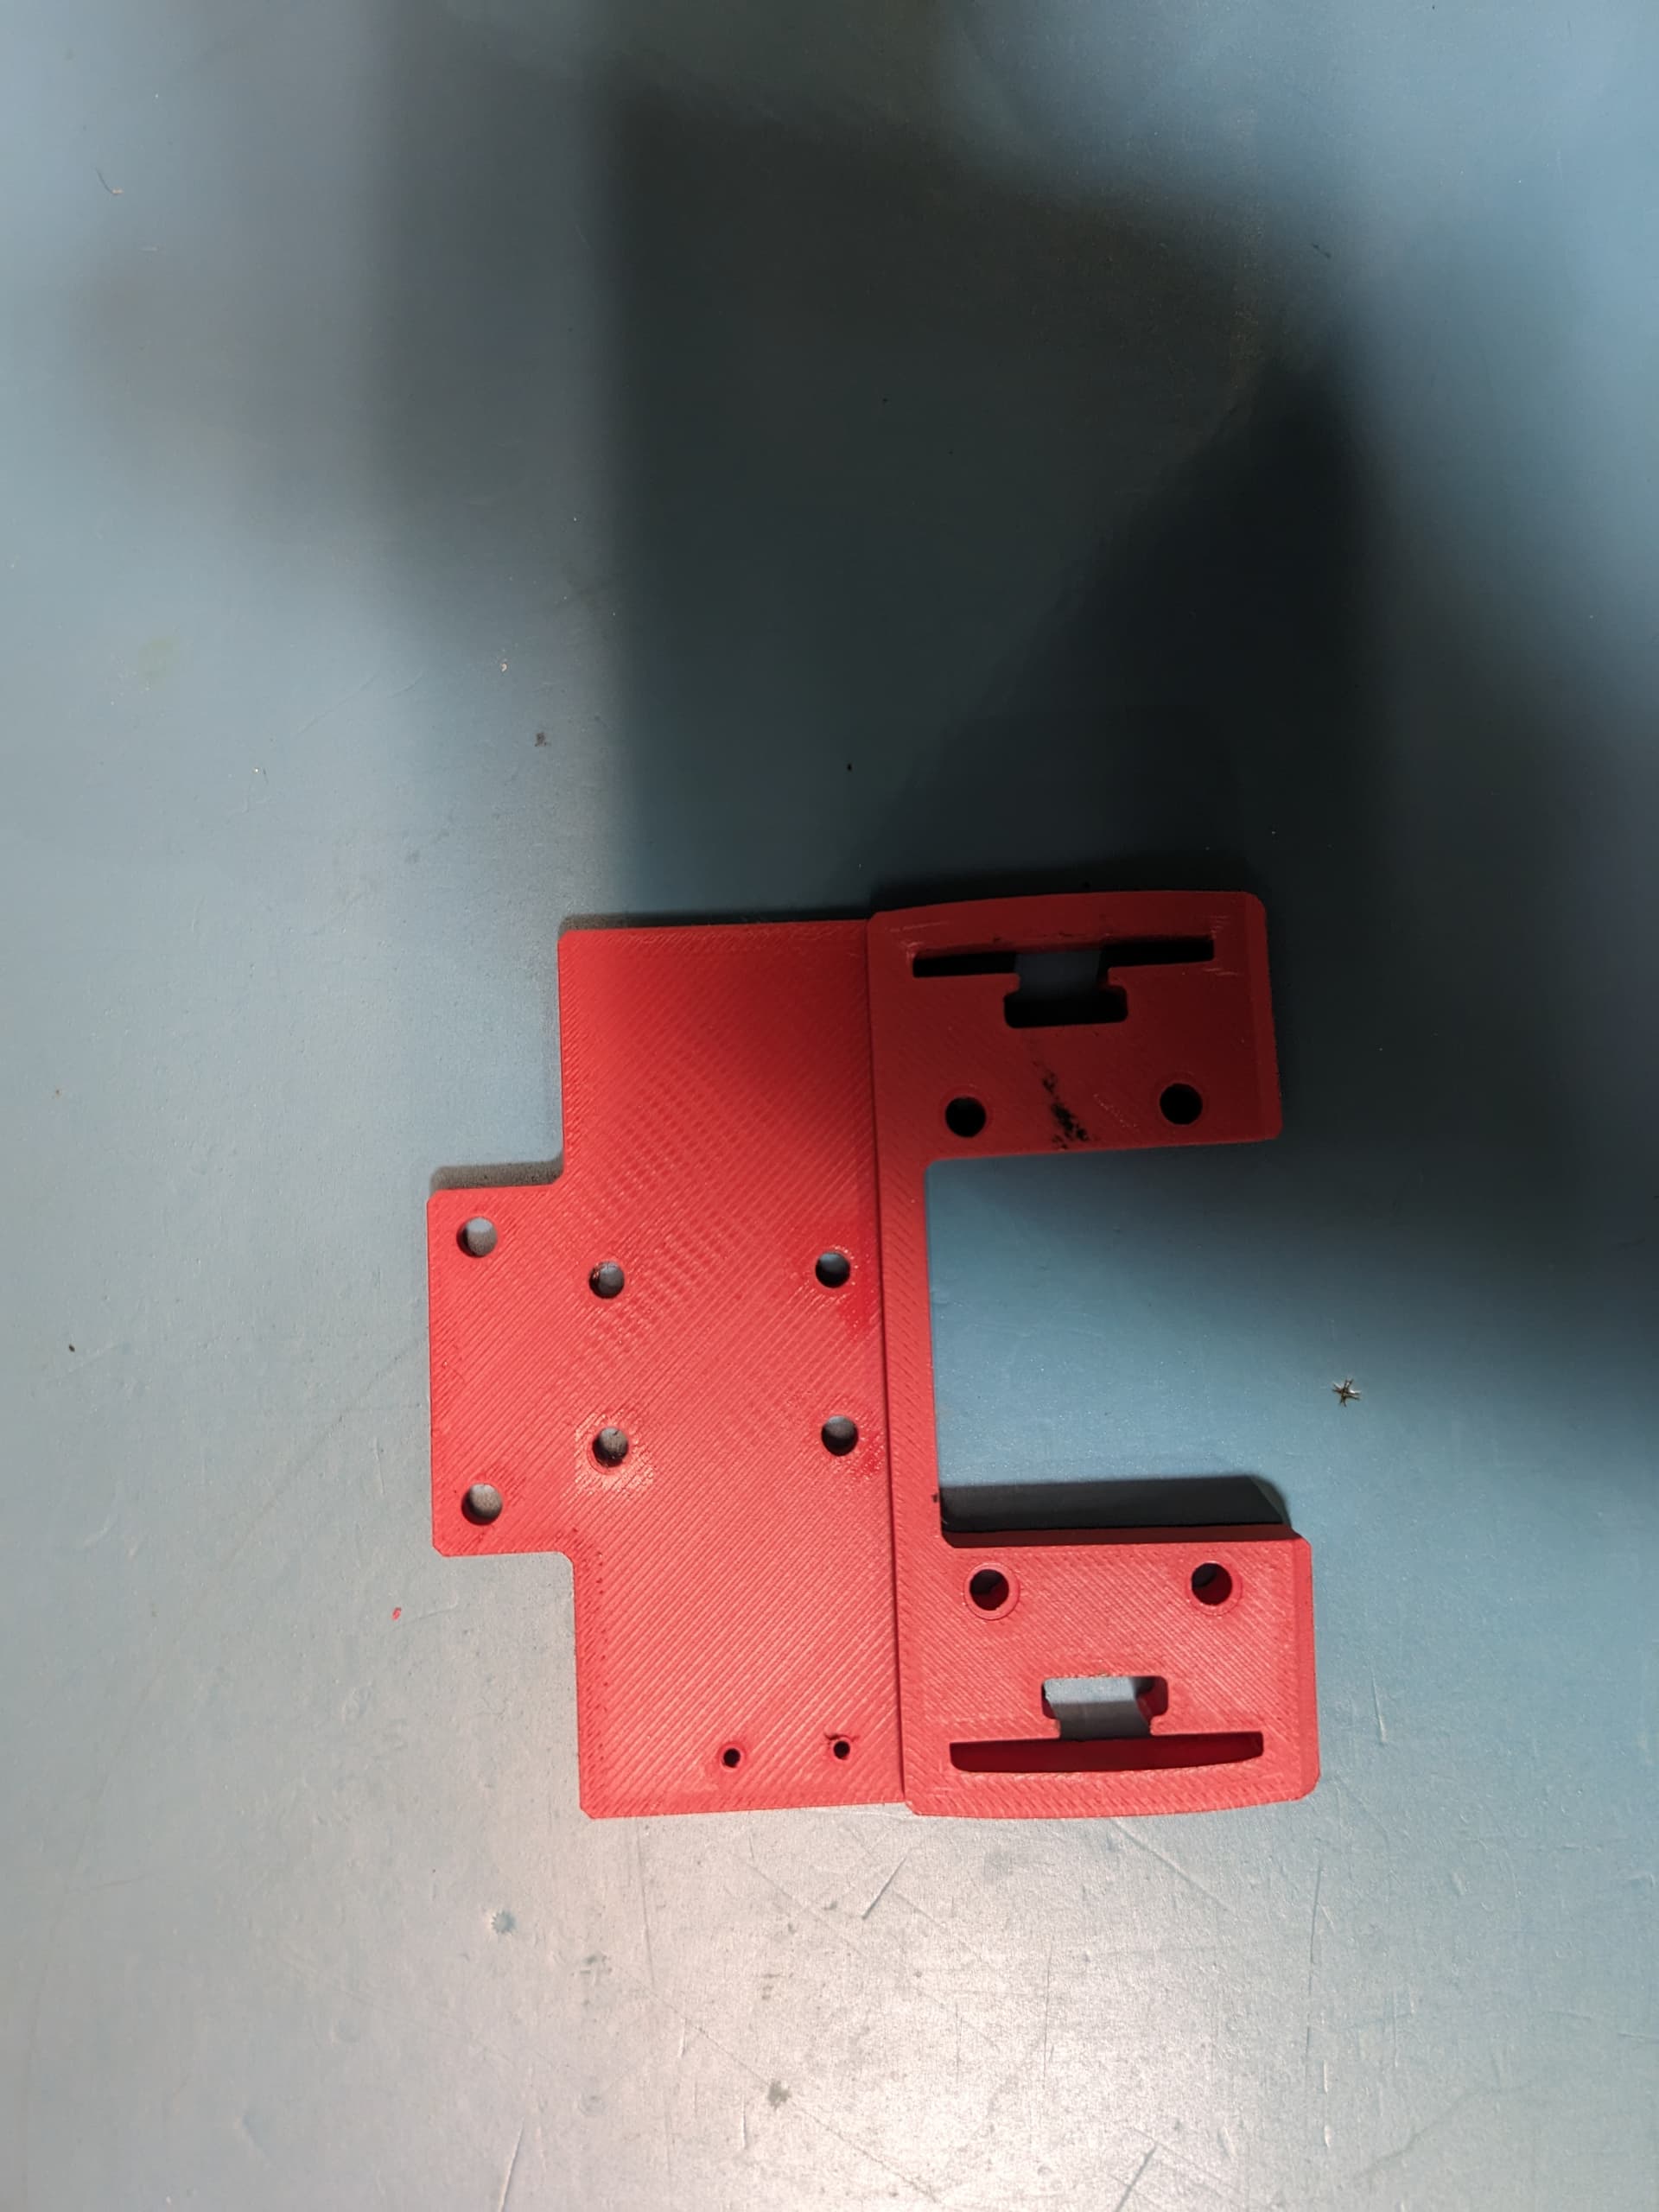
Hi @stewart, I got someone to print me the parts to finish the upgrade. I think I did mostly right ![]() but I have a few questions:
but I have a few questions:
- Is the y endstop “tab” on the on the y linear rail part suppose to go between the y-end stop sensor or does it go on top it? Your picture from post #5 shows that it’s on top, and flushed to the rail. The part I printed out have the tab in between the two “posts” of the sensor.
Your setup:

Mine:
This is what I printed:
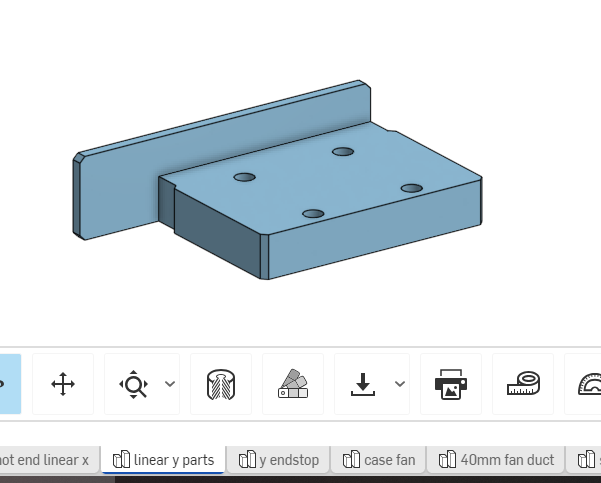
2. Also, there are three parts in the y endstop tab (onshape), am I suppose to use them all? I only see you used 1, and I only used 1.
3. Is there anything special I need to reconfigure once I switch to volcano/v6-type hot end, other than the nozzle sizes? Or any other nitty gritty physical adjustment to get it running properly?
Sorry if it’s confusing but let me know if I need to clarify. Thanks a lot!
I got it up and running and is pretty sure the “tab” goes between the two posts of the sensors. The two side fans are not running so I’ll have to open the printer again.
Greetings everyone,
I’m in process upgrading a CR-30 with the linear rail. Question for the E3Dv6 hot end mount. I’m getting some deformation of the part from the tension on the belts. I felt I applied the same what felt like the same tension from the stock mount, but the plastic deformed a bit after sitting for a weekend.
I used bambu PLA to print at 100% infill with 4 shells. Maybe I should try a 50% infill instead? I feel like PETG would end up flexing even more than the PLA. Any tips would be greatly appreciated!
P.S. I moved the holes on Stewarts rail mount to fit a Creality branded linear rail meant for Ender 3s. Seen here:
not all PLAs have the same stiffness. and some colors affect bonding and rigidity. I’m pretty sure I printed mine in either PETG or carbon filled PLA (Ziro). I’d recommend a carbon-filled filament regardless of type. it’ll be much more likely to hold shape.
1 Like
I was afraid you’d say that! I ended up ordering a new nozzle and CF PLA to print off the bracket on my normal FDM. It looks to be holding up
Many thanks!
1 Like
Stewart thanks for the information, ive done a lot of asking around on CR-30 related Discords, FB groups, Youtube videos etc and i dont think anyone else mentioned the issue with the bed warping.
My question is that i tried to dip my toes into Klipper with Crealitys Sonic Pad as i prefer Marlin, its had a lot of issues, main one being layer shifts at higher speeds, however I just ended up turning it down and increase the layer height to make up for it (maybe ill keep playing with stepper voltages etc) but the only thing i have left to set up is input shaping, do you know of an easy mount or way to set up input shaping on a CR-30 before I try my hand at design (it seems im one of 5 or 6 people on the internet that bought a Sonic Pad for their CR-30)
I never tried input shaping on the CR30, only PA tuning (for which I used a 100mm x 20mm x 5mm slab printed in the direction of belt travel)
Noted! If i cant figure out how to speed up without layer shifts, is there any reason id want to swap the hot end? Planning on sticking to just PLA and PETG of course.