I think stock is around 700mm
Based on your comment, you mentioned that stock is “very long,” so should I go for 600-650mm? Or stick with the same length as stock?
Also, what’s the purpose of double fans? I understand it’s for cooling but why 2, efficiency or quicker cooling? I see e3d hot ends only have 1.
Thanks!
the length of the tube is what’s required given the position of the extruder. if it’s moved to the center of the beam (cross top or bottom near belt), it could be a little shorter.
the stock head has two fans. they’re just small. there are three fans in the setup, stock, too. one is the hto end cooling fan (middle). the other two are part cooling. more part cooling means a) faster printing b) and longer bridging. and generally better quality output.
I see. Is there a way to calculate fan need or it is just by feel and cablibration. For example is 50mm better than 40mm/30mm if PSU allows, when is too much/litte, is there a sweet point?
Just learned 10 things from your comment. Thanks a lot!
dealing just with part cooling, more is better up to the point where it’s blowing the part off the printer. you can always choose how much cooling power to use in the slicer/gcode settings. but not having enough cooling is going to be an issue more than having too much.
1 Like
thanks for all the info Stewart. a few questions for you
- do you have a video or an additional guide on which five bolts to loosen and where they are located
- for the E3D v6, is the CR-39 12 V or 24 V
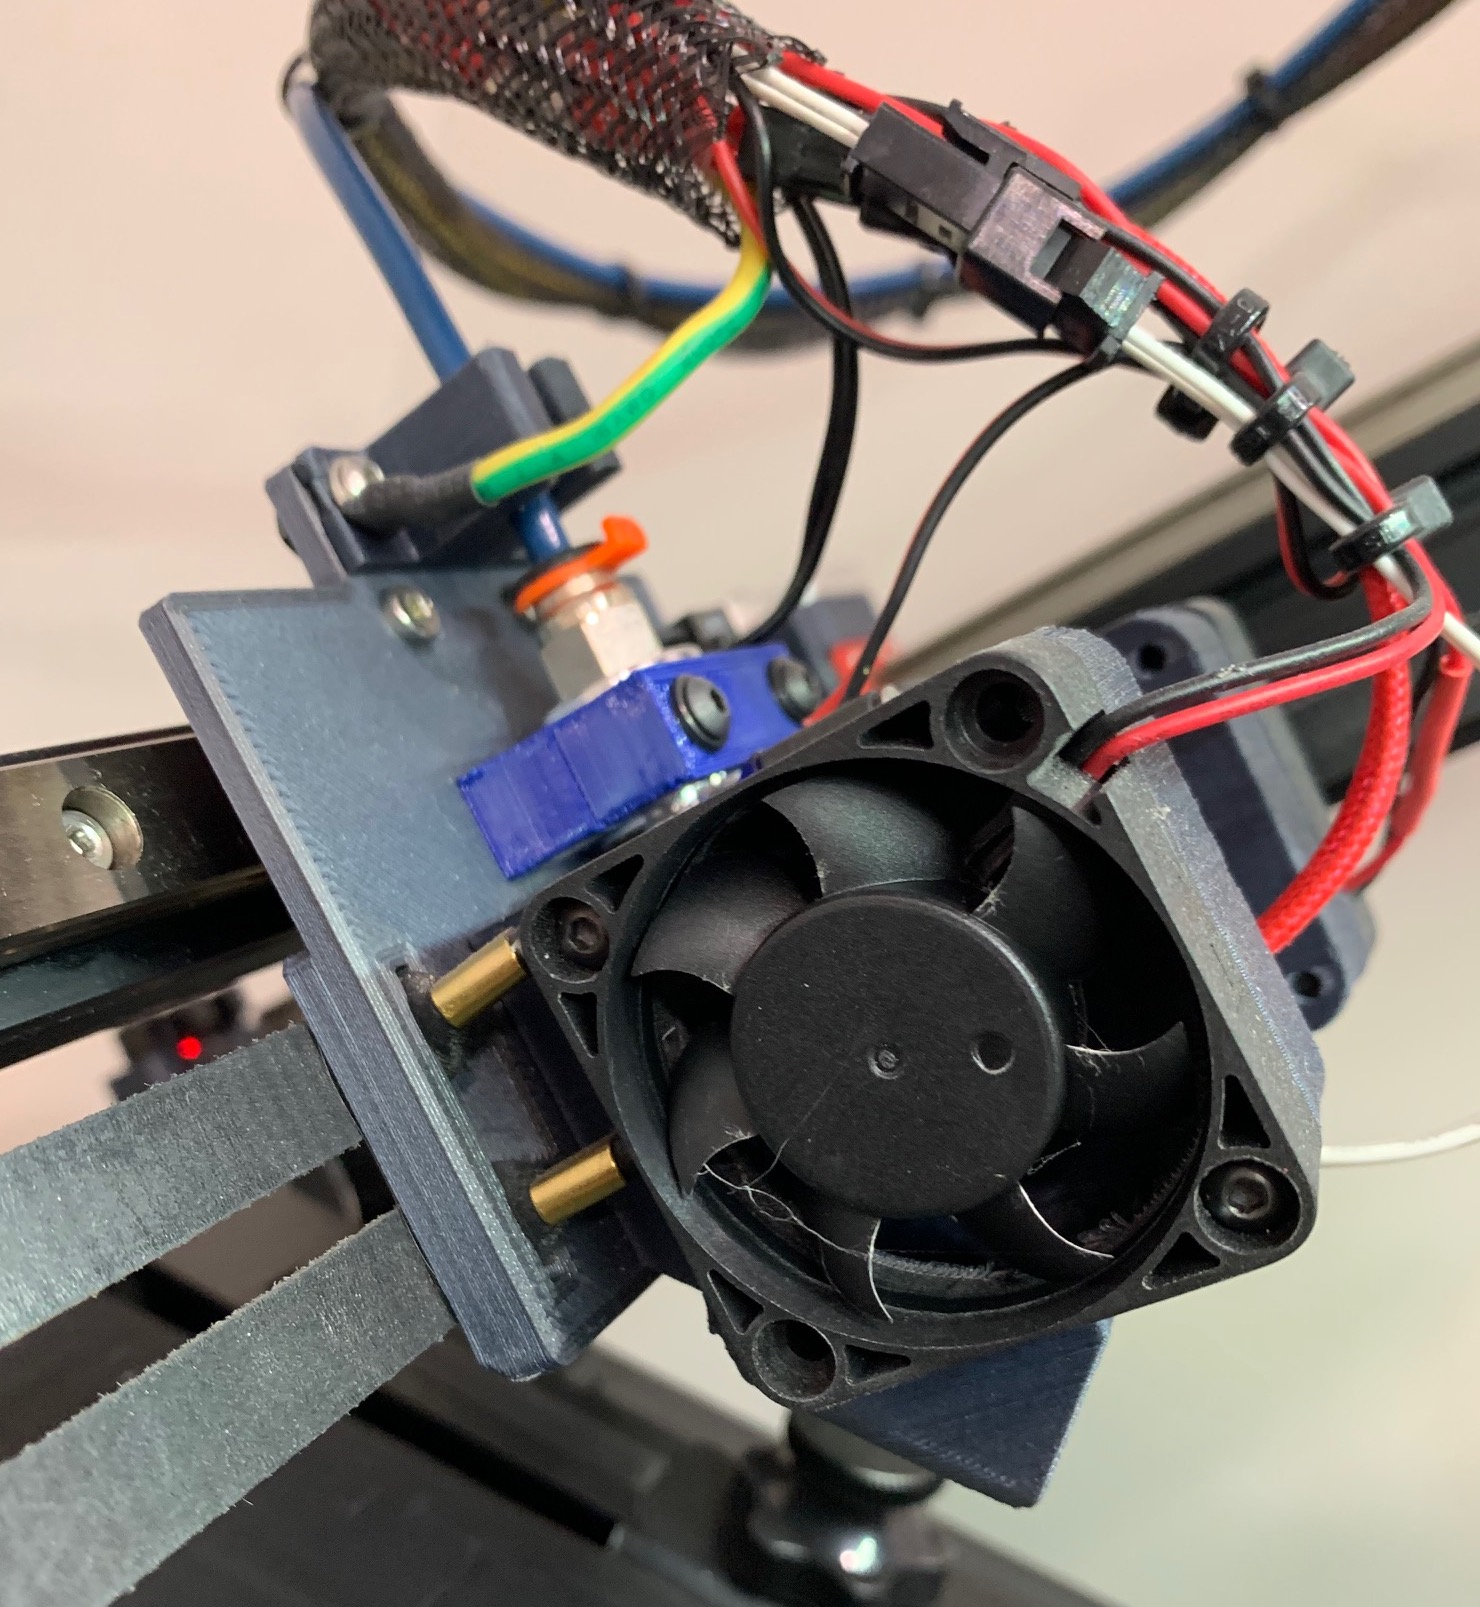
- for the 40 mm fans, what do you recommend for the CR-30? Is just the fan duct file from your Onshape doc the one to print to mount those or other files
- is there a kit out there for the y-axis linear rails? i see one for the x-axis.
hi @phlynch and welcome!
-
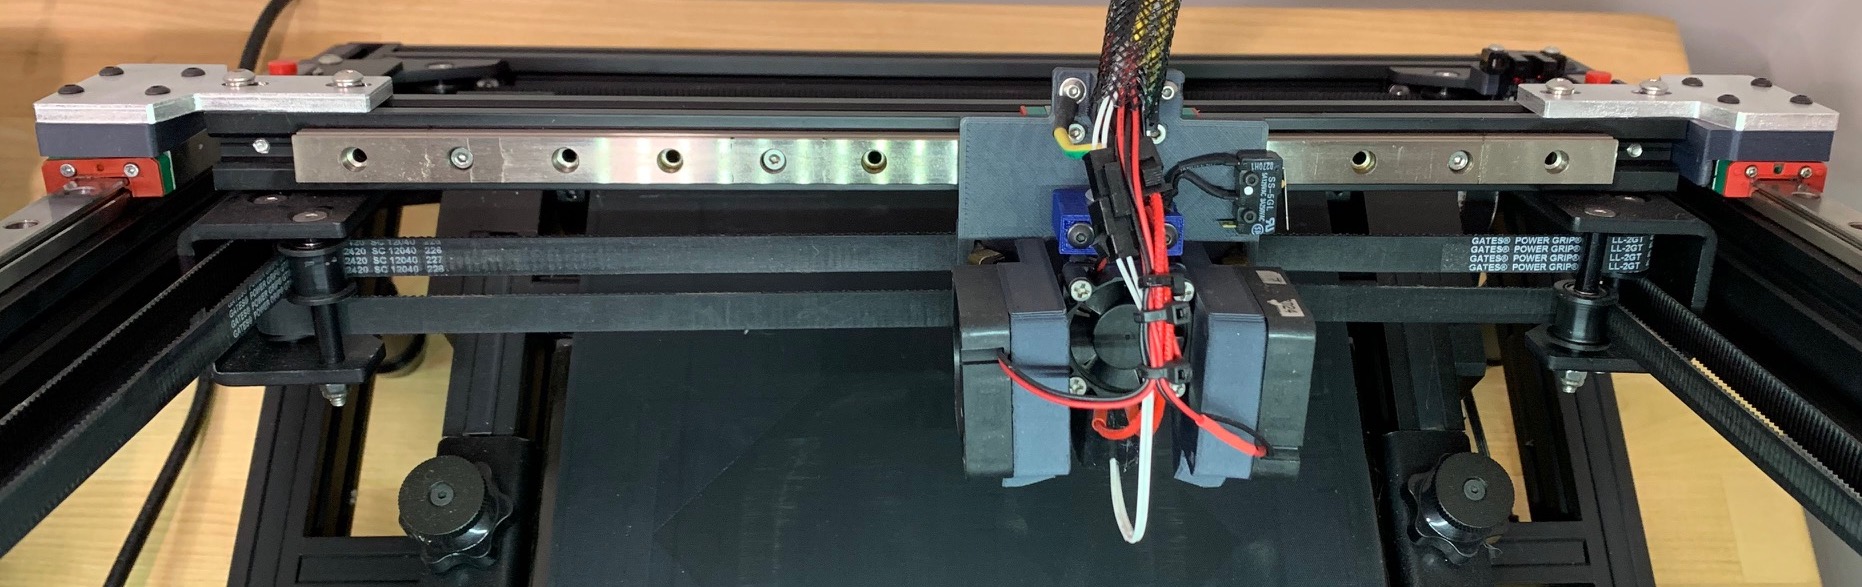
I do not. the five bolts are all but the center bolt closest to the start of the belt (nearest the nozzle when centered). just barely breaking the other 5 free allows the bed to “breathe” when heated.
-
it’s all 24V
-
I’ve purchased many different 40mm x 10mm fans from Amazon. some are better than others. the ones that work best are no longer available
 all of my mods are in the Onshape doc.
 -
I did a Y rail mod and the parts are in my Onshape doc. I am not aware of anyone making a kit for it.
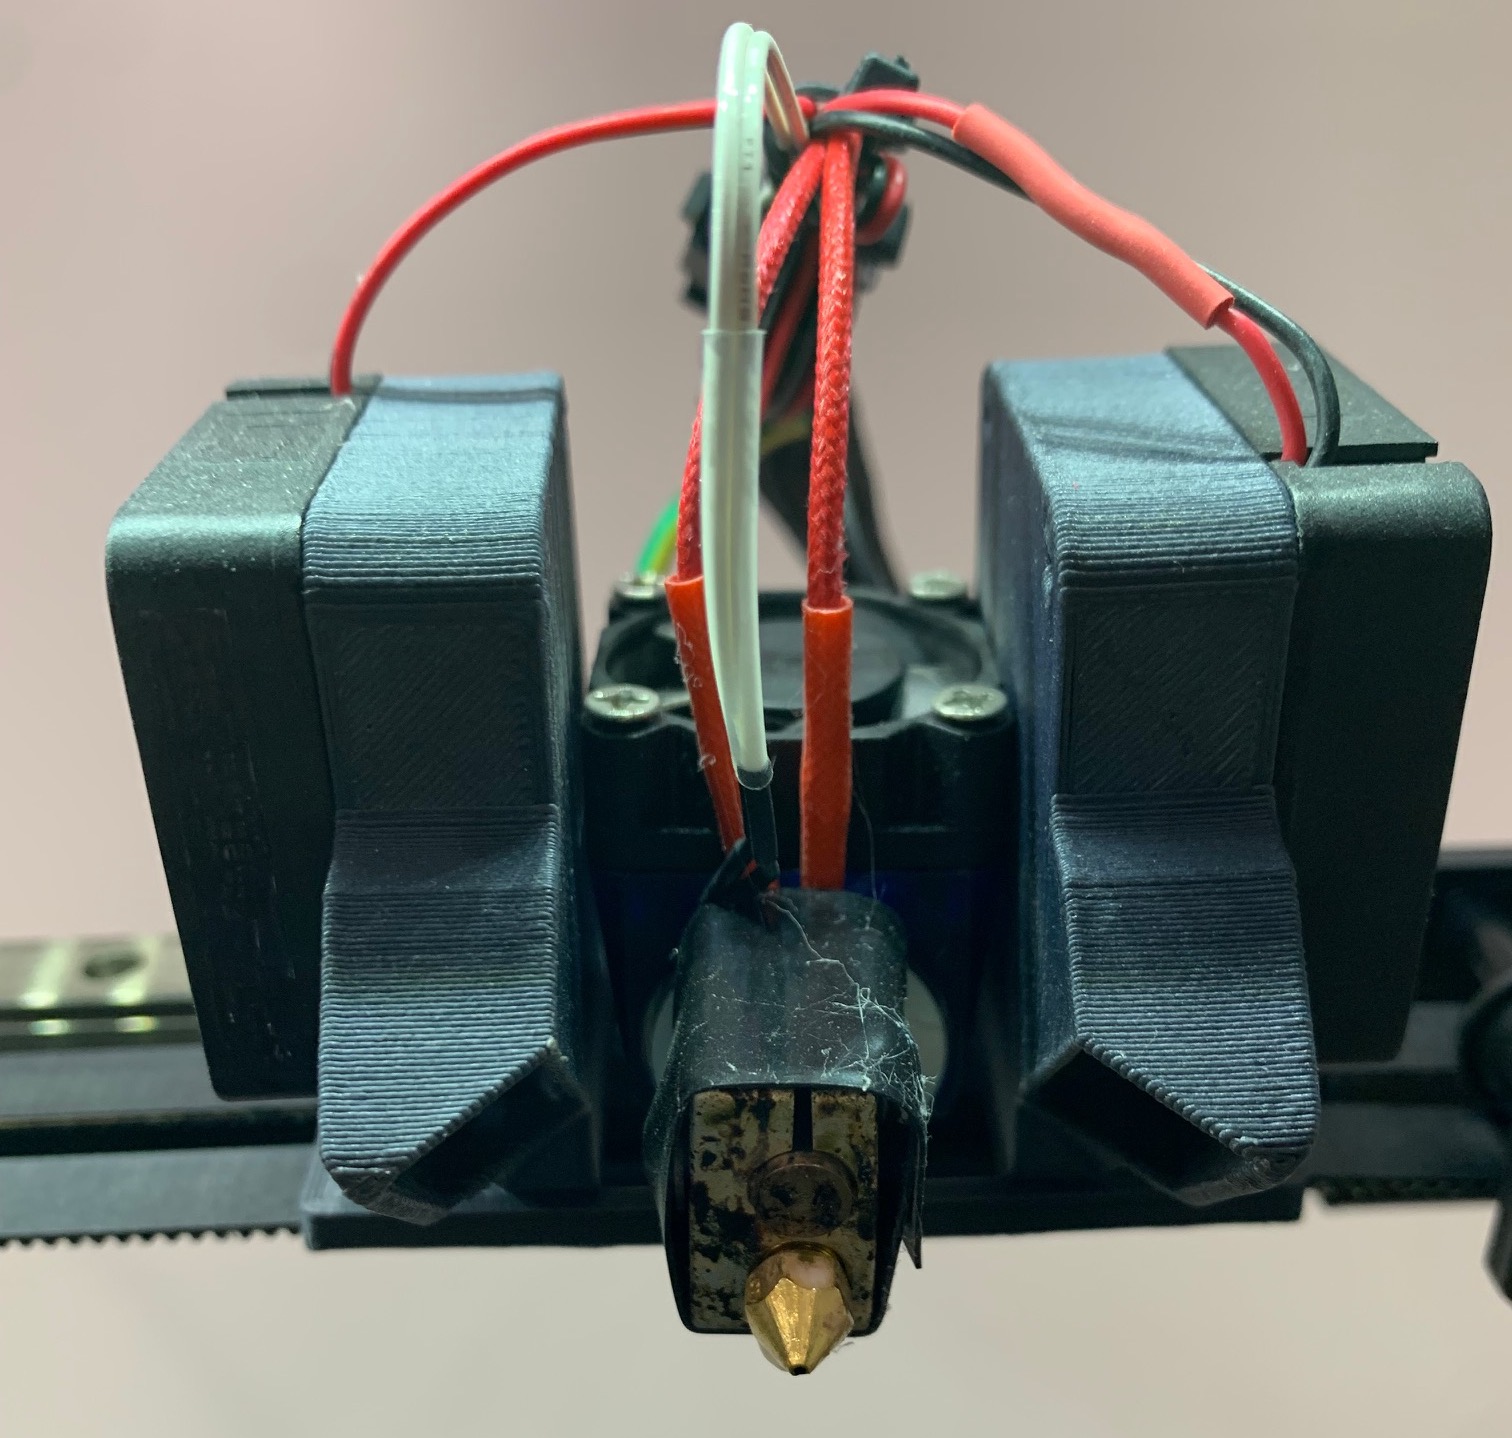
Stewart, when you get a chance, do you mind taking some more pictures of the hot end for E3D Volcano? I’m trying to picture how you mounted them all together I know I need to print the 40mm fan ducts from your OnShape file but not sure what else are needed. Thanks a lot.
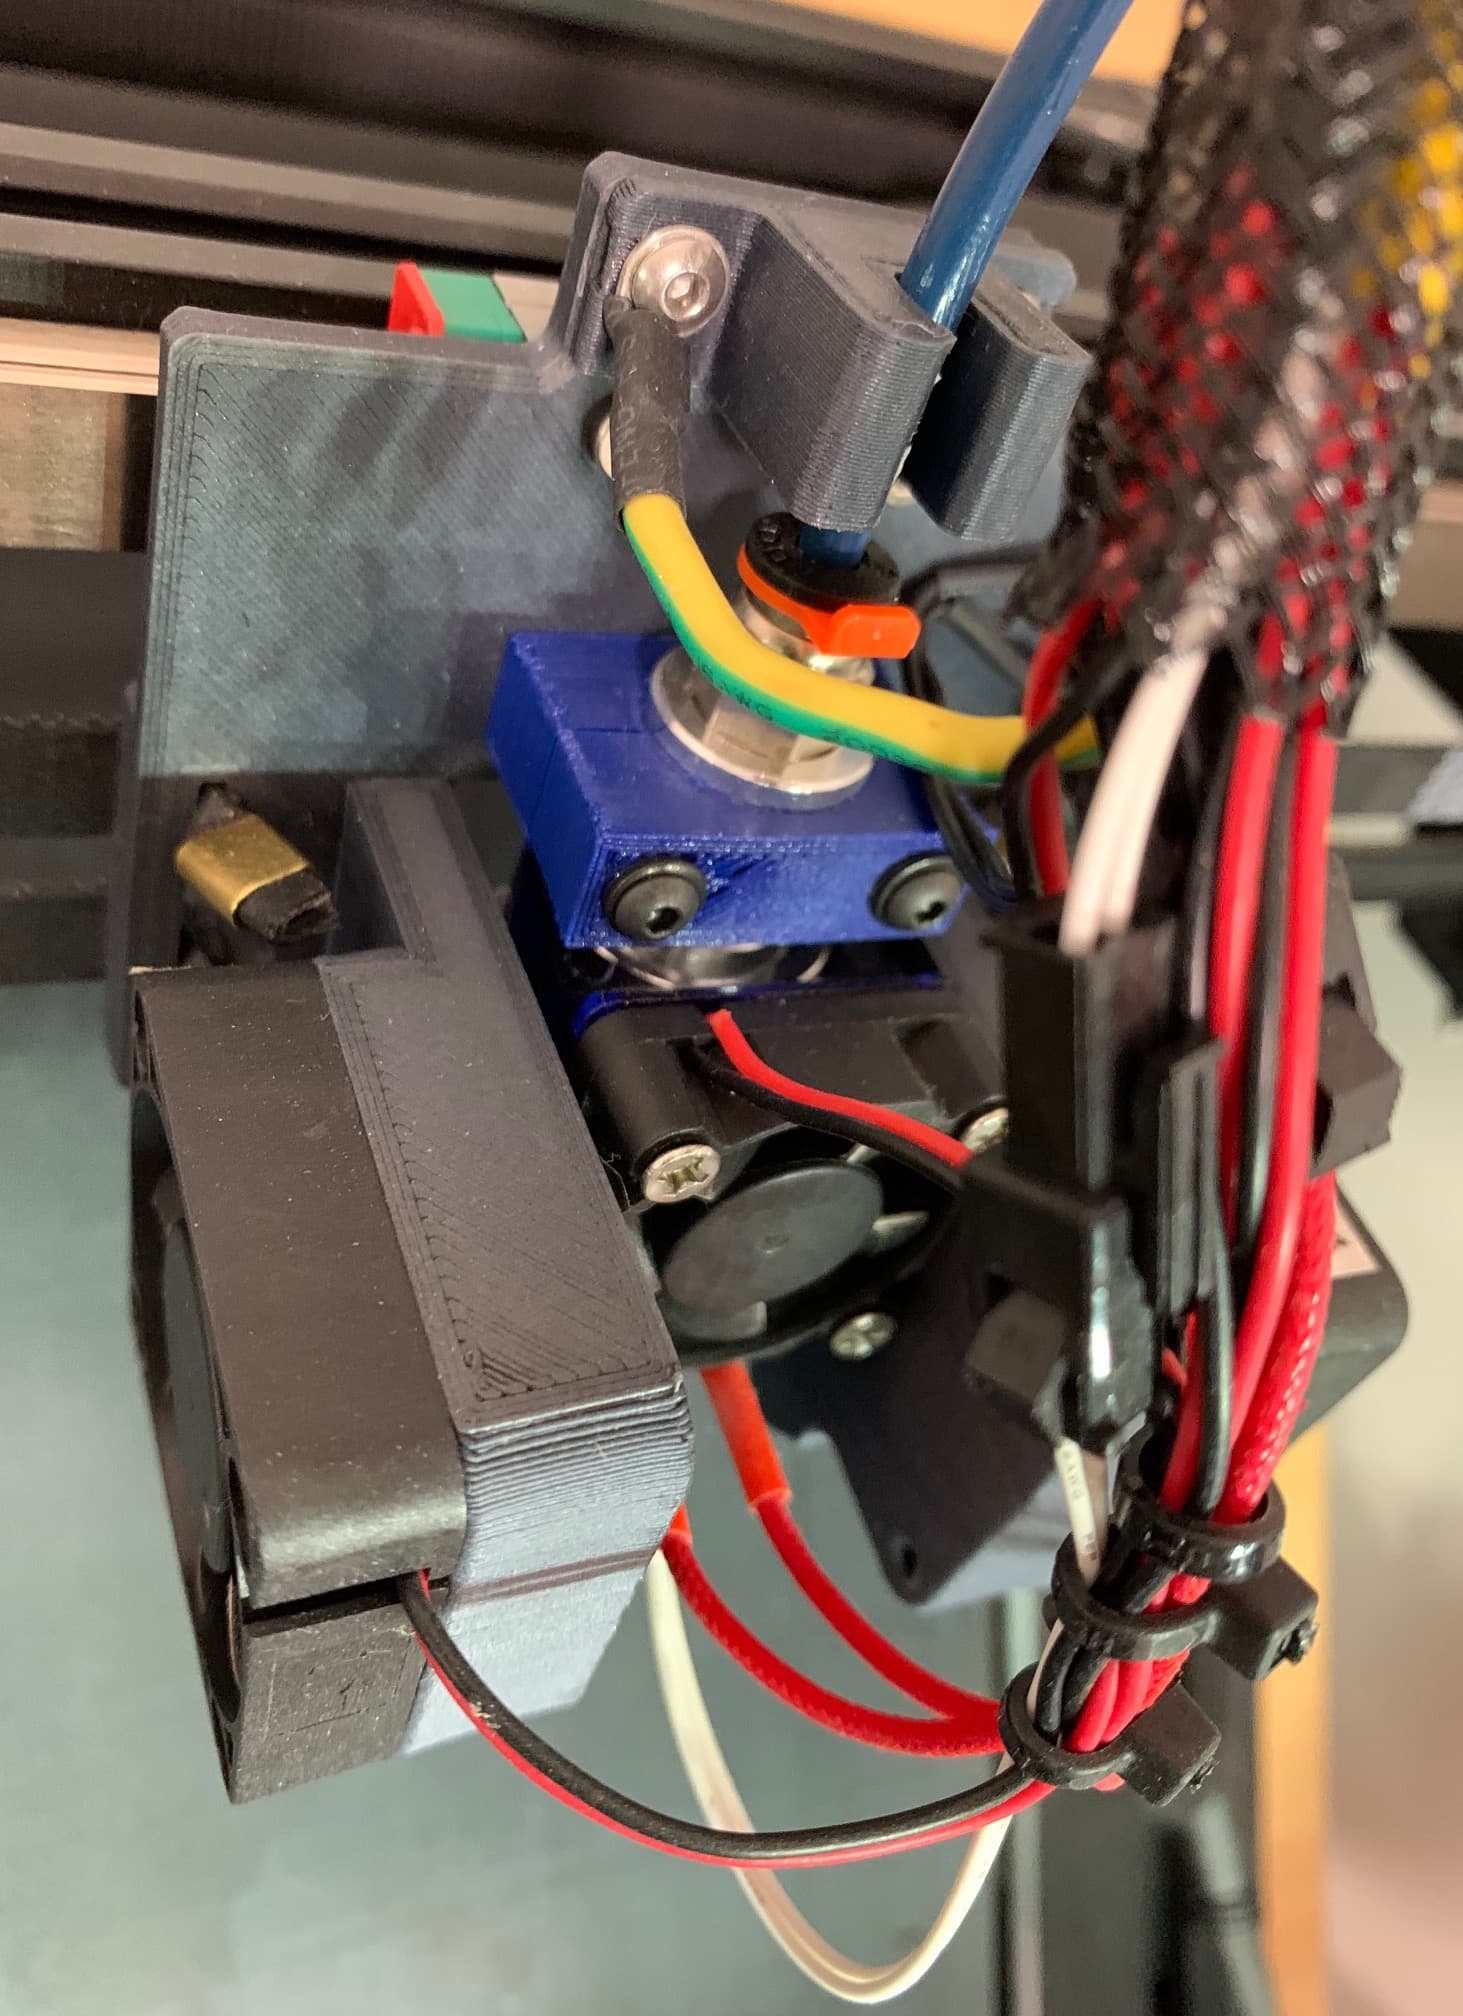
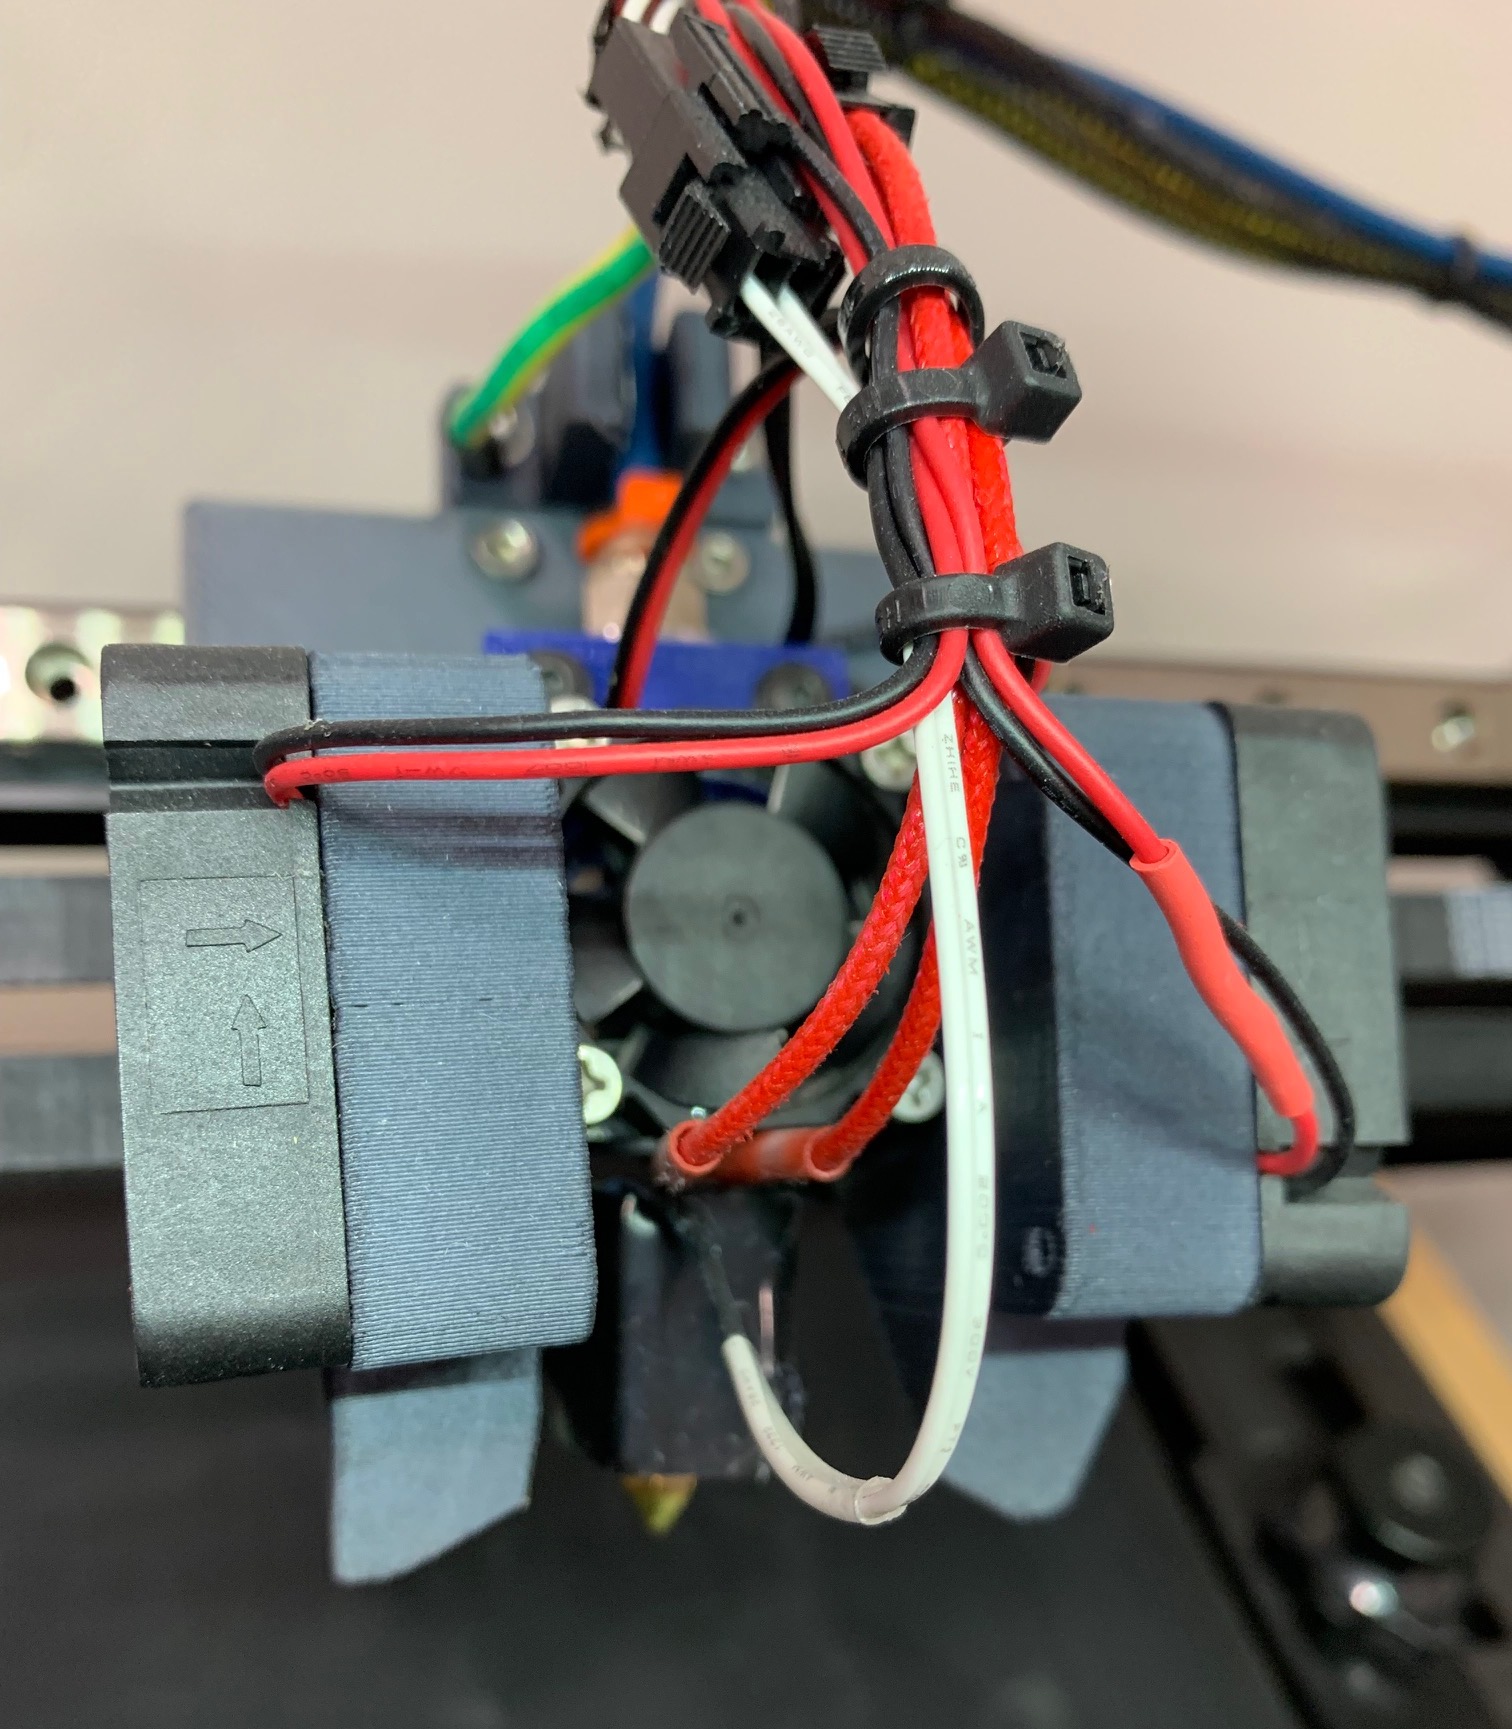
This is good, thanks a lot. I was fixated on one of the pic in your first post and couldn’t figure out what goes where.
@phlynch the bolt on the middle-right is the one Stewart mentioned it should be tight
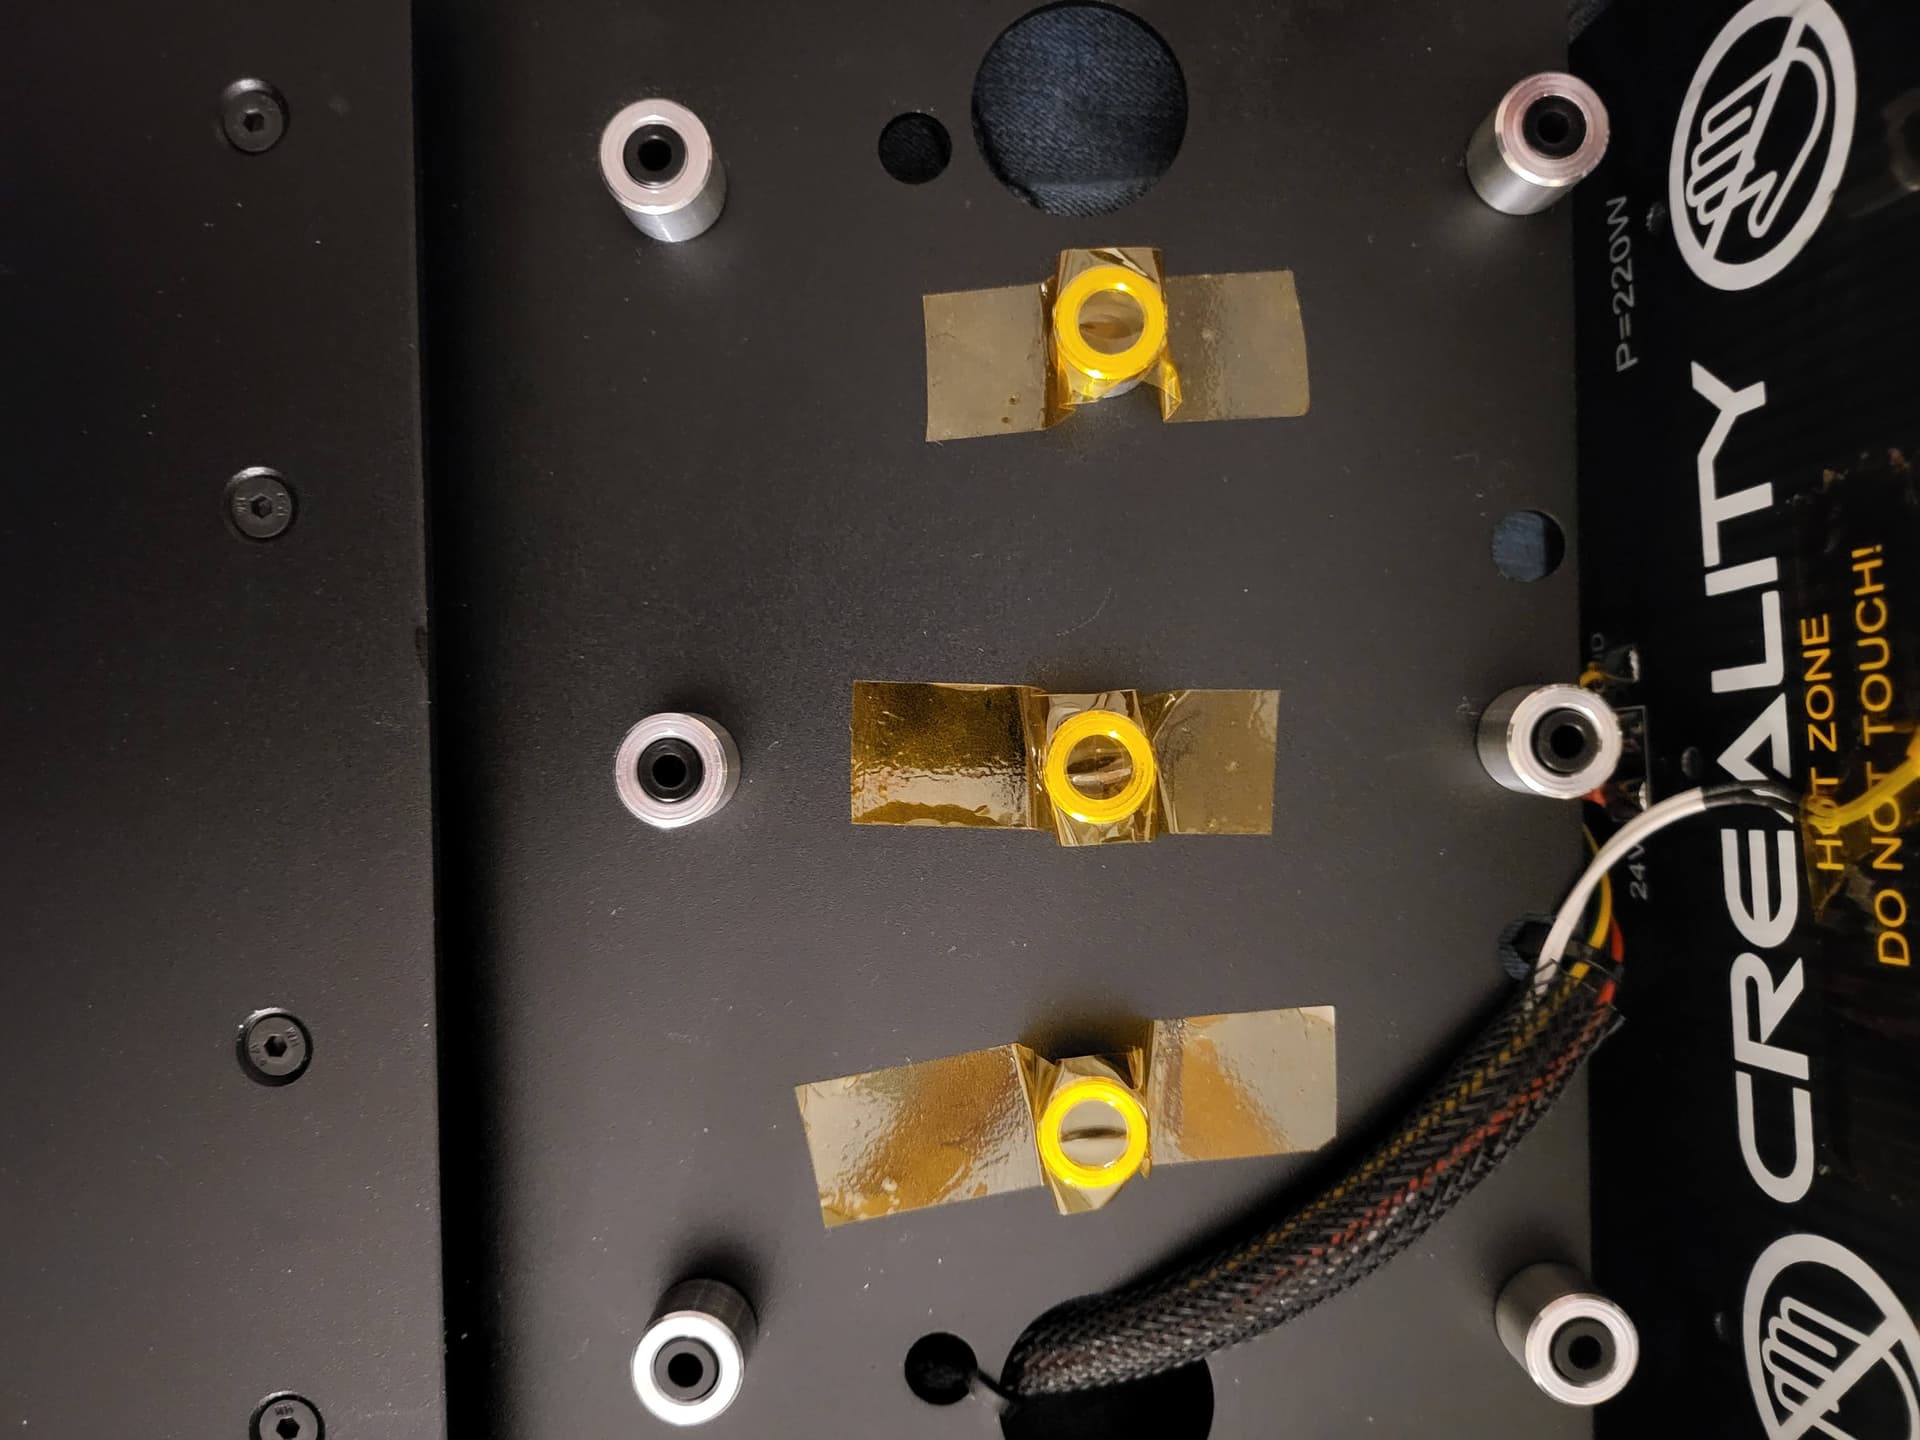
@Wolfie thanks Wolfie. so to get access to these bolts, the belt needs to be removed i assume and these will then be directly visible. and in regards to middle-right, i am assuming second row from the top, and then the right column is the bolt that is kept tight. all others loosened by 1/4 turn. thanks for clarification.
All’s correct. Creality has video on youtube on how to remove belt/heat bed. Just be careful when you lift the bed or place it down. Some people damaged the electronics.
Stewart, after double-checking out the pictures you just posted and the ones from our first post, it seems like the newer one used a new plate (printed?). Since I have a currently-crappy CR-30, I want to reduce the amount of parts printing I have to do, if I do print the parts/plate with stock hotend/nozzle, I will re-print once I get the new hot end setup with PLA CF. Any downside to using stock plate/bracket? I see that with stock plate/bracket you used the parts in “40mm fan duct” tab the OnShape document, but with your plate/bracket, you have a new/re-designed duct (e3d hotend linear x").
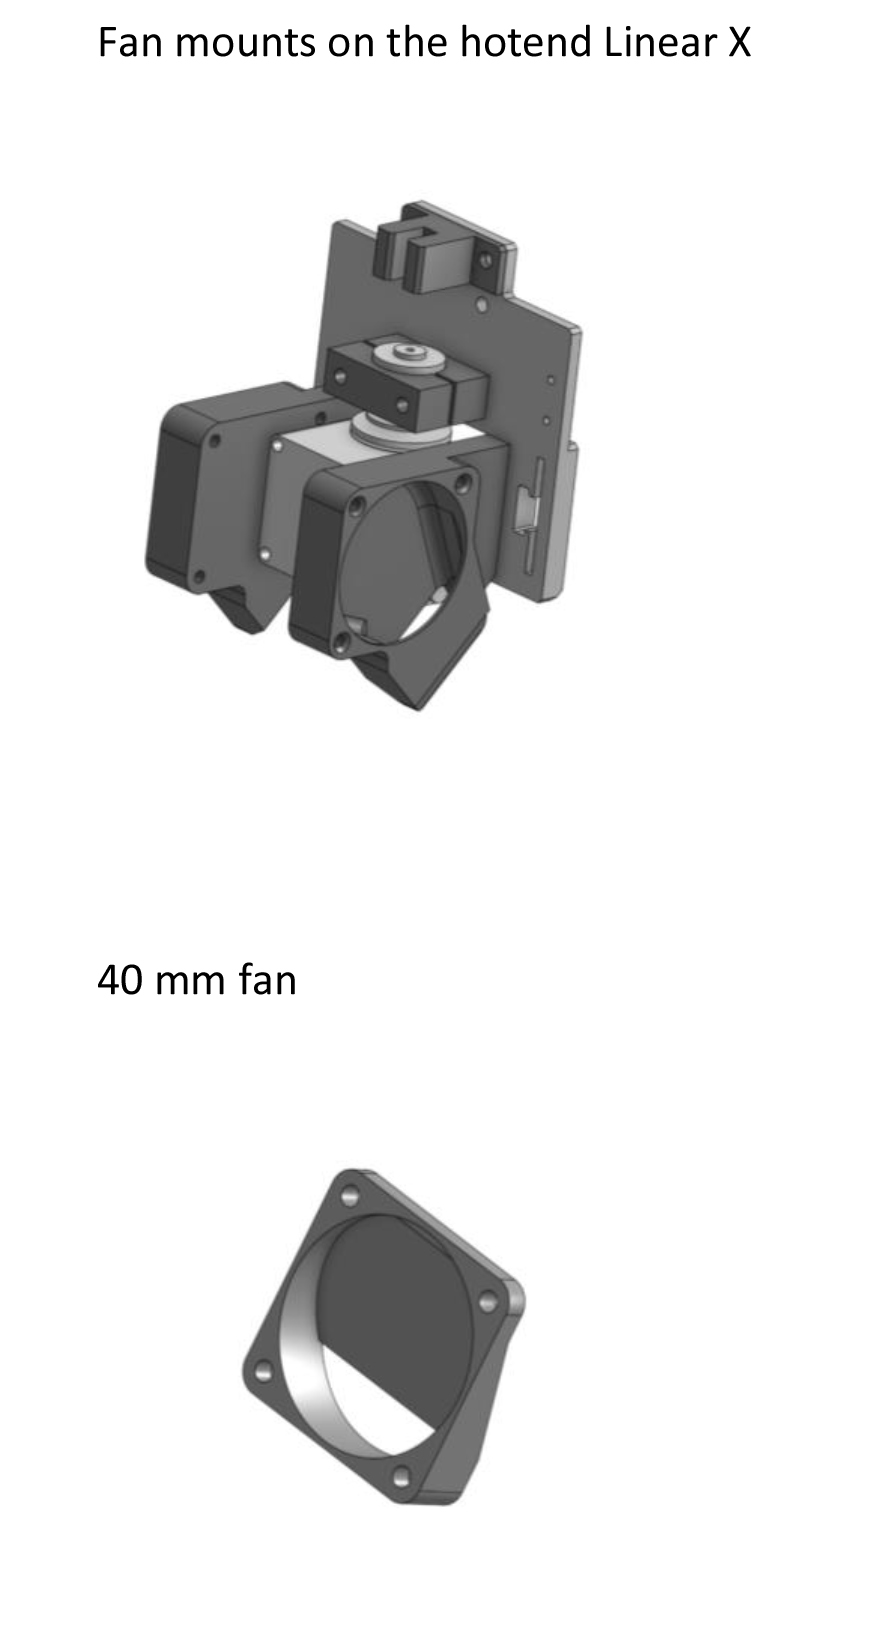
sorry to bother you Stewart. for the fan mounts (40 mm), i see some fan mounts on the “hot end linear x” model. and then a separate file for “40 mm fan duct”. if i go with 40 mm fan, is this what mounts to the “hot end linear X” instead of what you have on there. the air funneling looks different on the 40 mm fan duct compared to what is on the hotend linear X. And for the X-axis upgrade, would you be able to list what is to be printed. I think the hole template, rail aligner, fan ducts for sure but can’t tell if new y-stops are required or anything else. didnt see new y stops mentioned in your youtube video other than lower them. thanks. doing this with your files will save me about $70 versus going with a pre-made kit so really appreciate it
.
the printed plate is thicker where the belts mount which is important to keep them aligned because the pillow block of the X rail pushes the mount point a bit. there may be other reasons, but I’d have to dig into it and try and remember ![]()
the early design used the lower model. it was more of an “A” frame look. the top of the thread shows the original. pics just posted are the newer version. both models use the same 40mm fan, though.
so i understand correctly, use the fan shrouds in the hotend llnear X model, and those are 40 mm fan size, correct
both shrouds work with the 40mm fans. the shrouds are individual to each design. so pick the shroud that goes with the model you’re using.
1 Like
i just checked all those bed bolts. mine were actually all very light on tightness so only had to tighten the center right one to a firm torque so maybe Creality has changed their torque specs recently. i was expecting to find them all torqued down firm.
1 Like
Good day, I am definatly interested in doing this to my cr30, What length linear rail did you use 350mm?