Ok, I see. I did order that 330x330 PCP bed a while ago. I guess I will wait until it’s delivered to judge the quality of that bed. If that’s alright, I’ll get build plates for the 330x330. If not, I’ll keep looking for another bed between 300 and 330. Just wanted to make sure there’s no major advantage/disadvantage of either the smaller or larger size in terms of mounting it.
So far, so good. Now I just need to build the printer

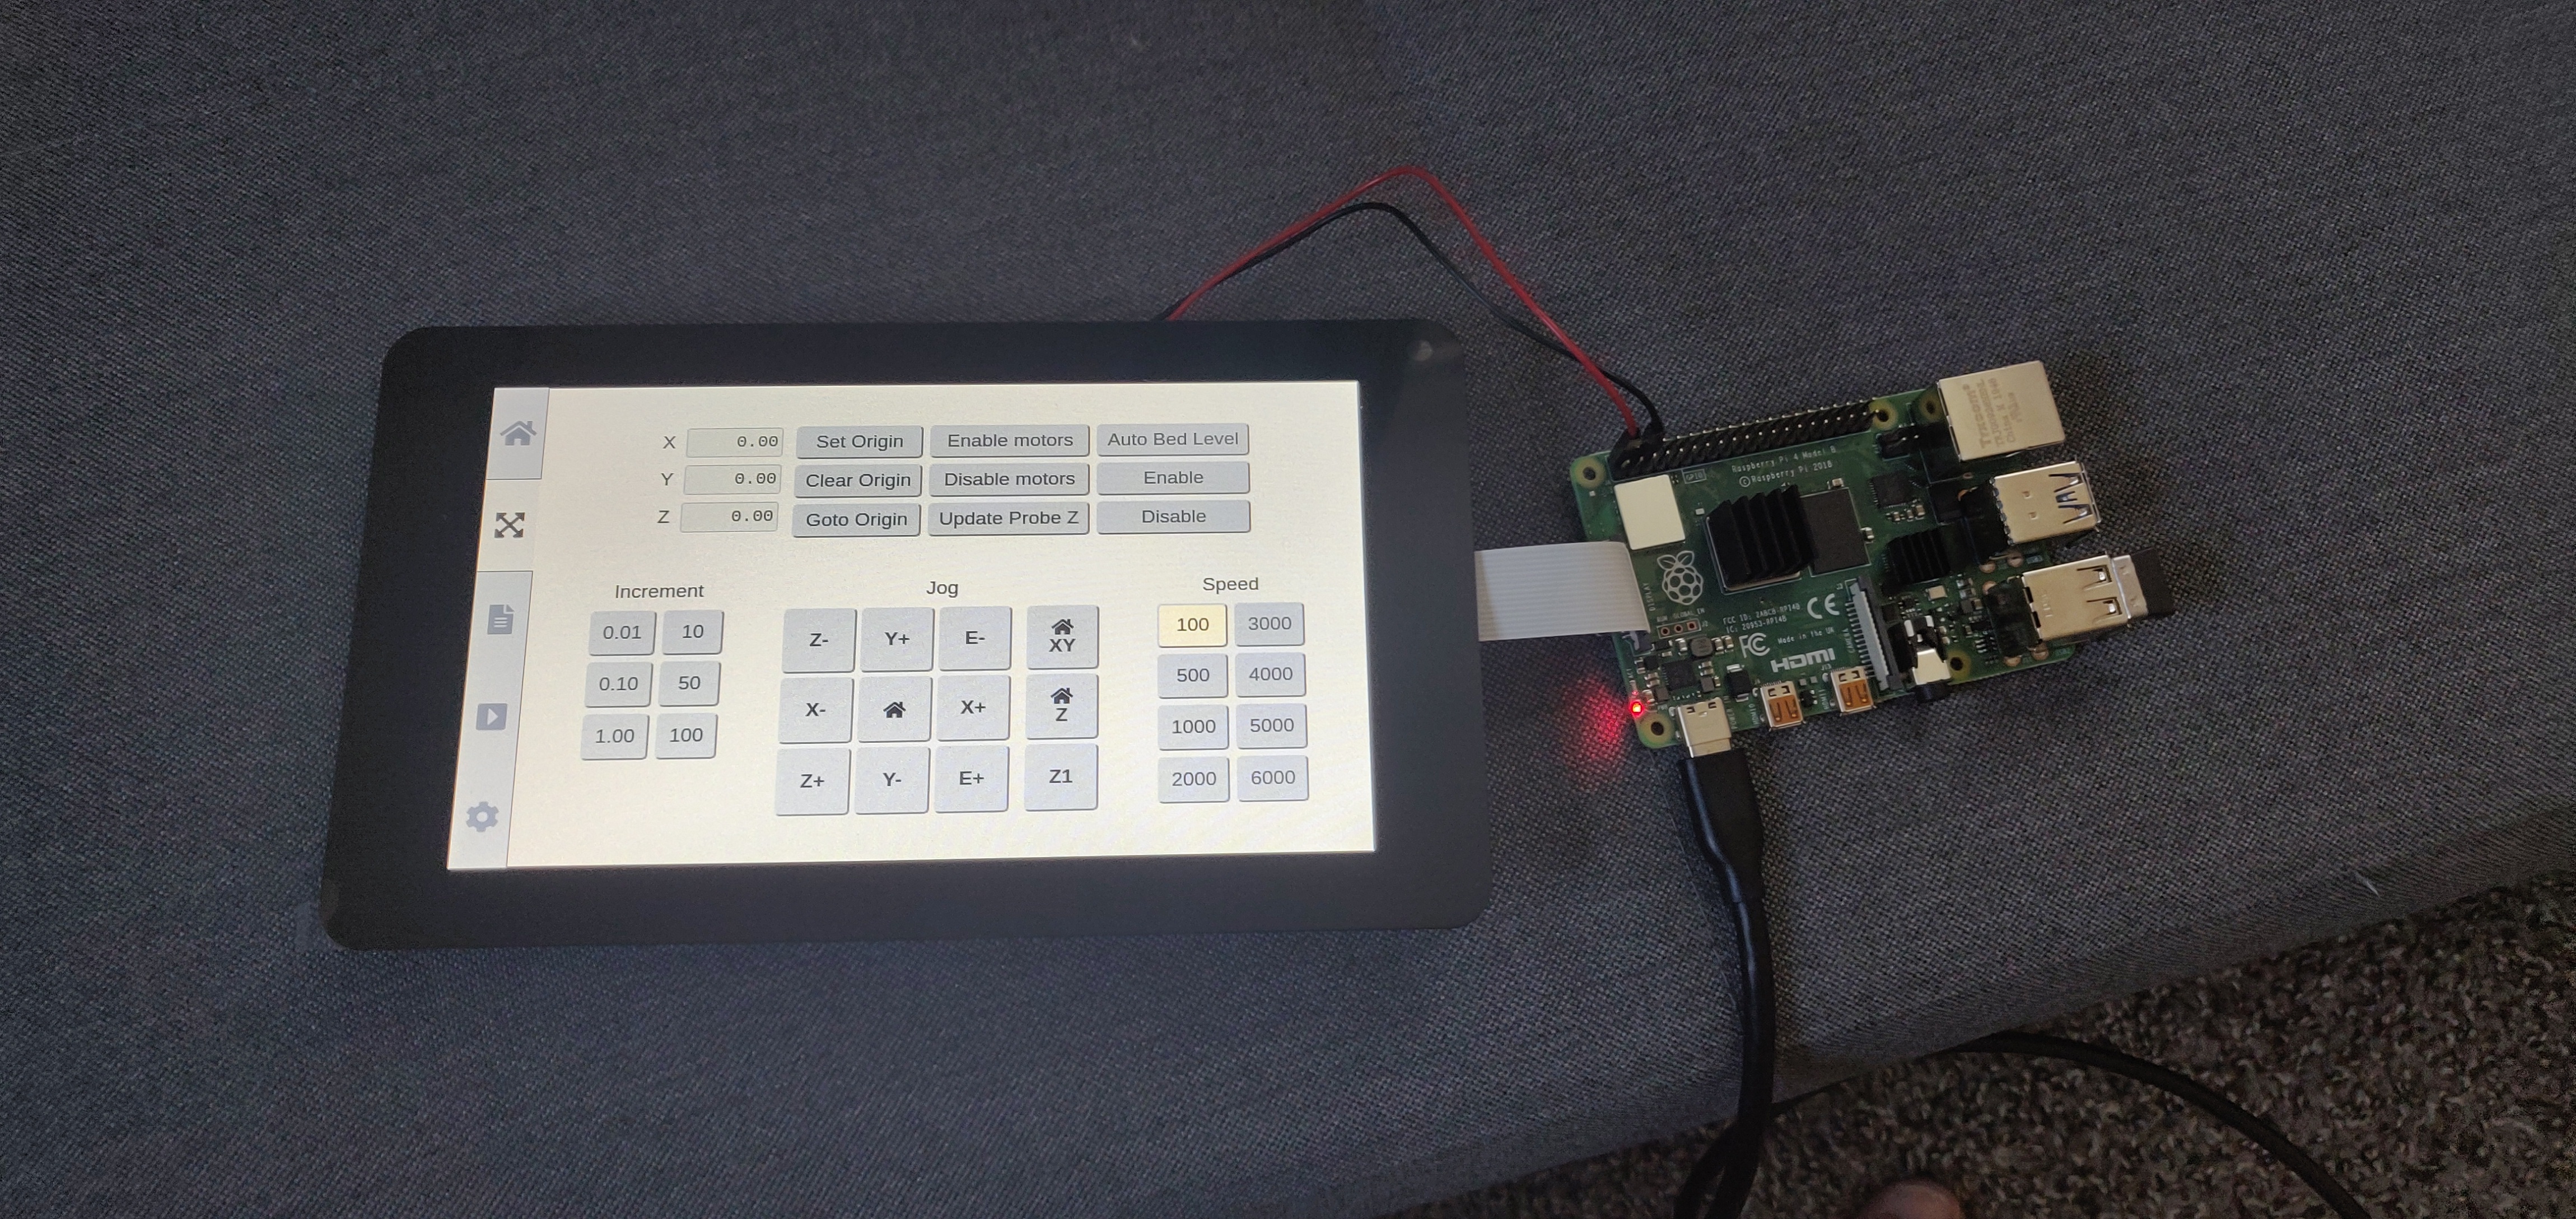
I also have octoprint running on that pi with the Moto plugin. Looking good.
3 Likes
Yes!  looks like a nice shop space.
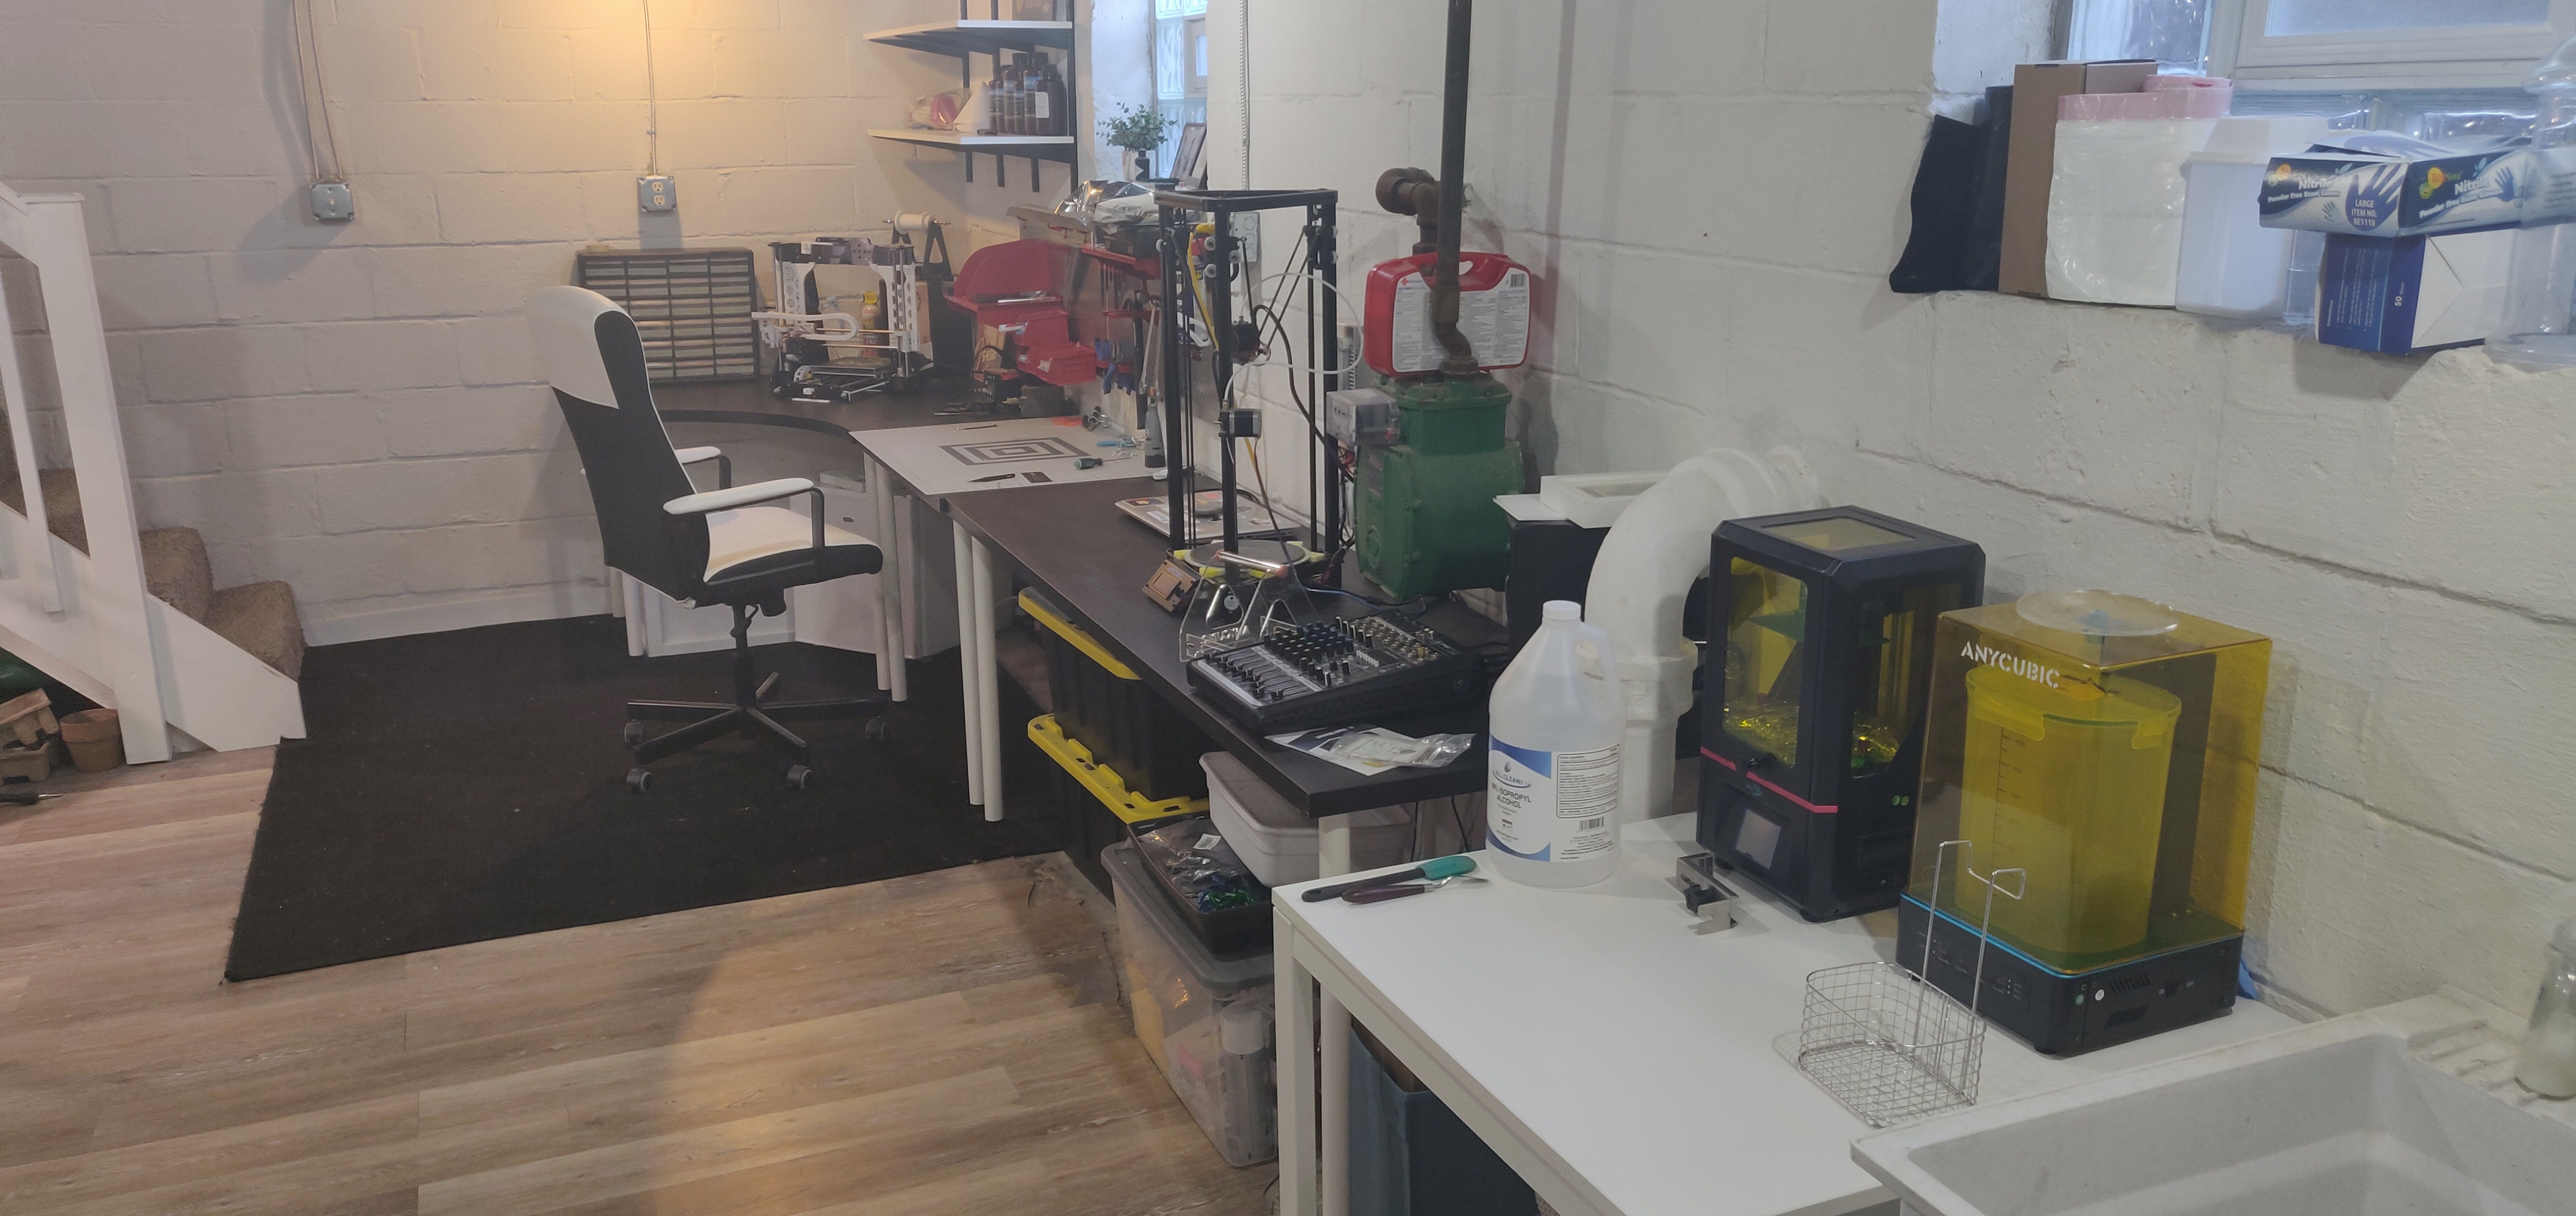
It’s getting there. I set aside about half of the basement for this, but just got around to setting things up there. Had most things in the garage before.
1 Like
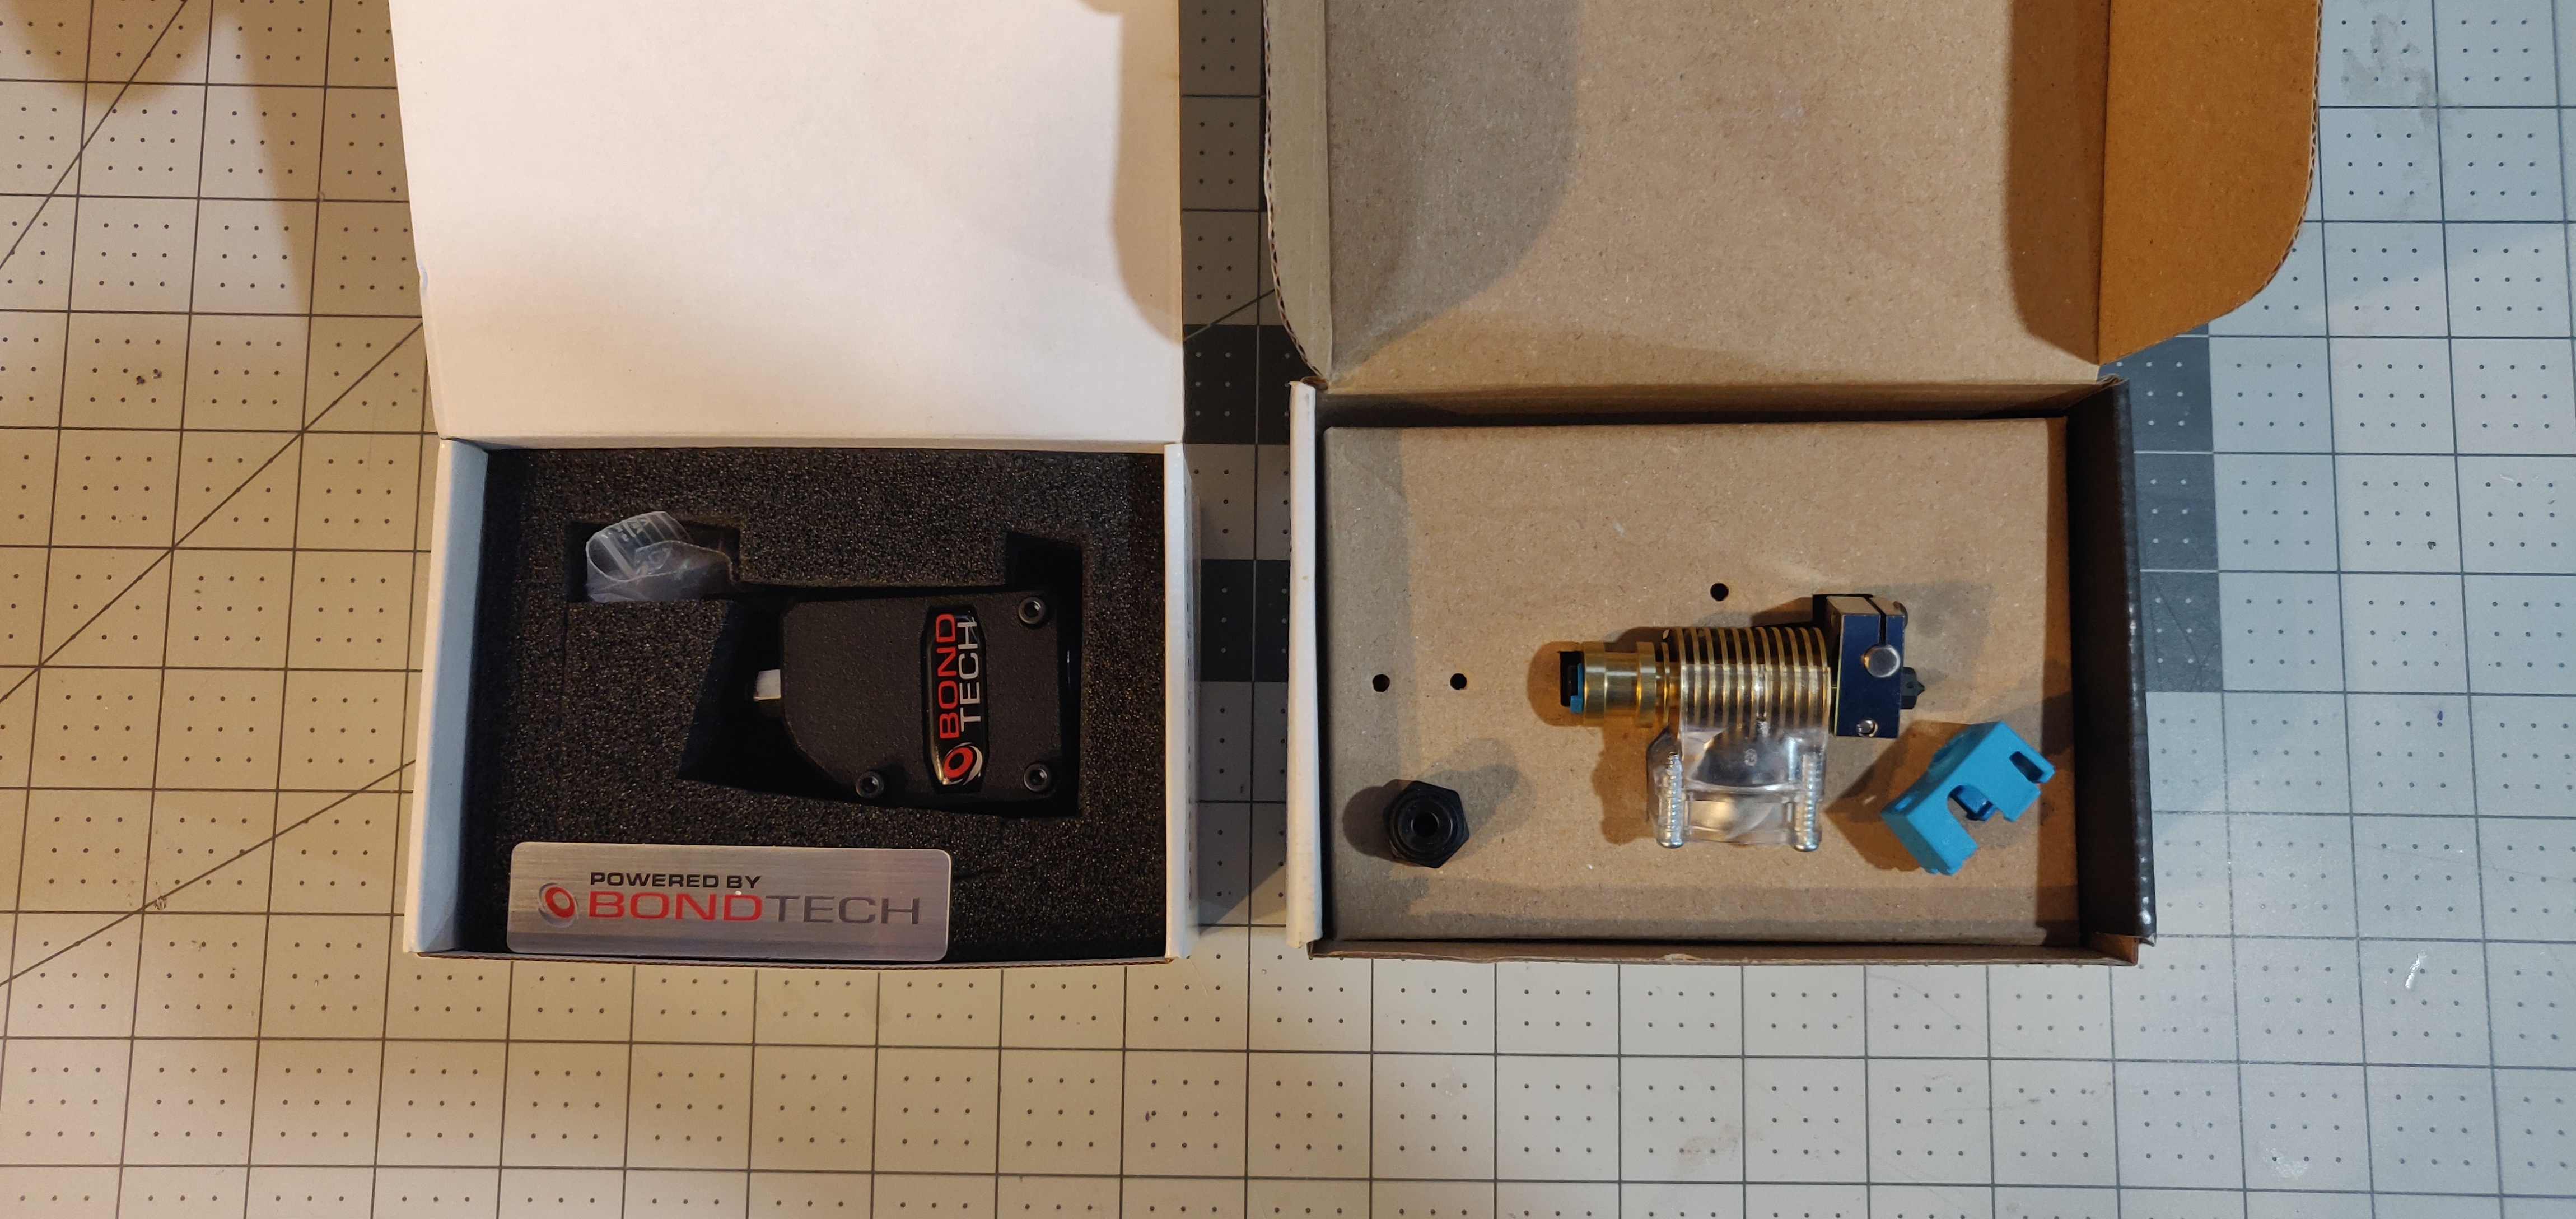
Just delivered today. I splurged a little on the anniversary “Gold” edition of the V6 (mainly because it had a better nozzle and capricorn lining/tubing) and a Bondtech extruder.
Probably won’t matter a bit in the end…
On all other printers I’m very happy with clones, but I wanted to give the real deal a try.
2 Likes
There’s always comfort in the genuine original part. I have found them to be slightly more durable than generic.
1 Like

haha. the fun begins.
1 Like
I was just looking through all the components I have and was wondering if anyone of you are using MOSFETs on the GridBot. I use them both for the hotend and bed ony other printers, but wanted to hear your opinion.
Also, I saw the discussion about endstops in @jeffeb3’s thread. What’s the verdict there. Do you recommend getting some or should I stick to the original plan?
I regret installing the mosfet. With 24V, there is less current. The skr also seems to have pretty sizeable mofsets built in.
I have been using sensorless homing. I have noticed once or twice it get a tad off, but nothing major. I have it homing into the blue side with the tabs.
Thanks for the feedback. I think I won’t put in any Mosfets then and stick with sensorless homing for the time being.
Adding optical endstops later is trivial (and cheap). I’ve done it a couple of times and can guide you through it (with CAD model / parts) if you decide to go that route.
Thanks, @stewart…I actually still have a set of optical endstops I wanted to use to replace the microswitches on another printer but never did. So I might just add those later if it makes sense.
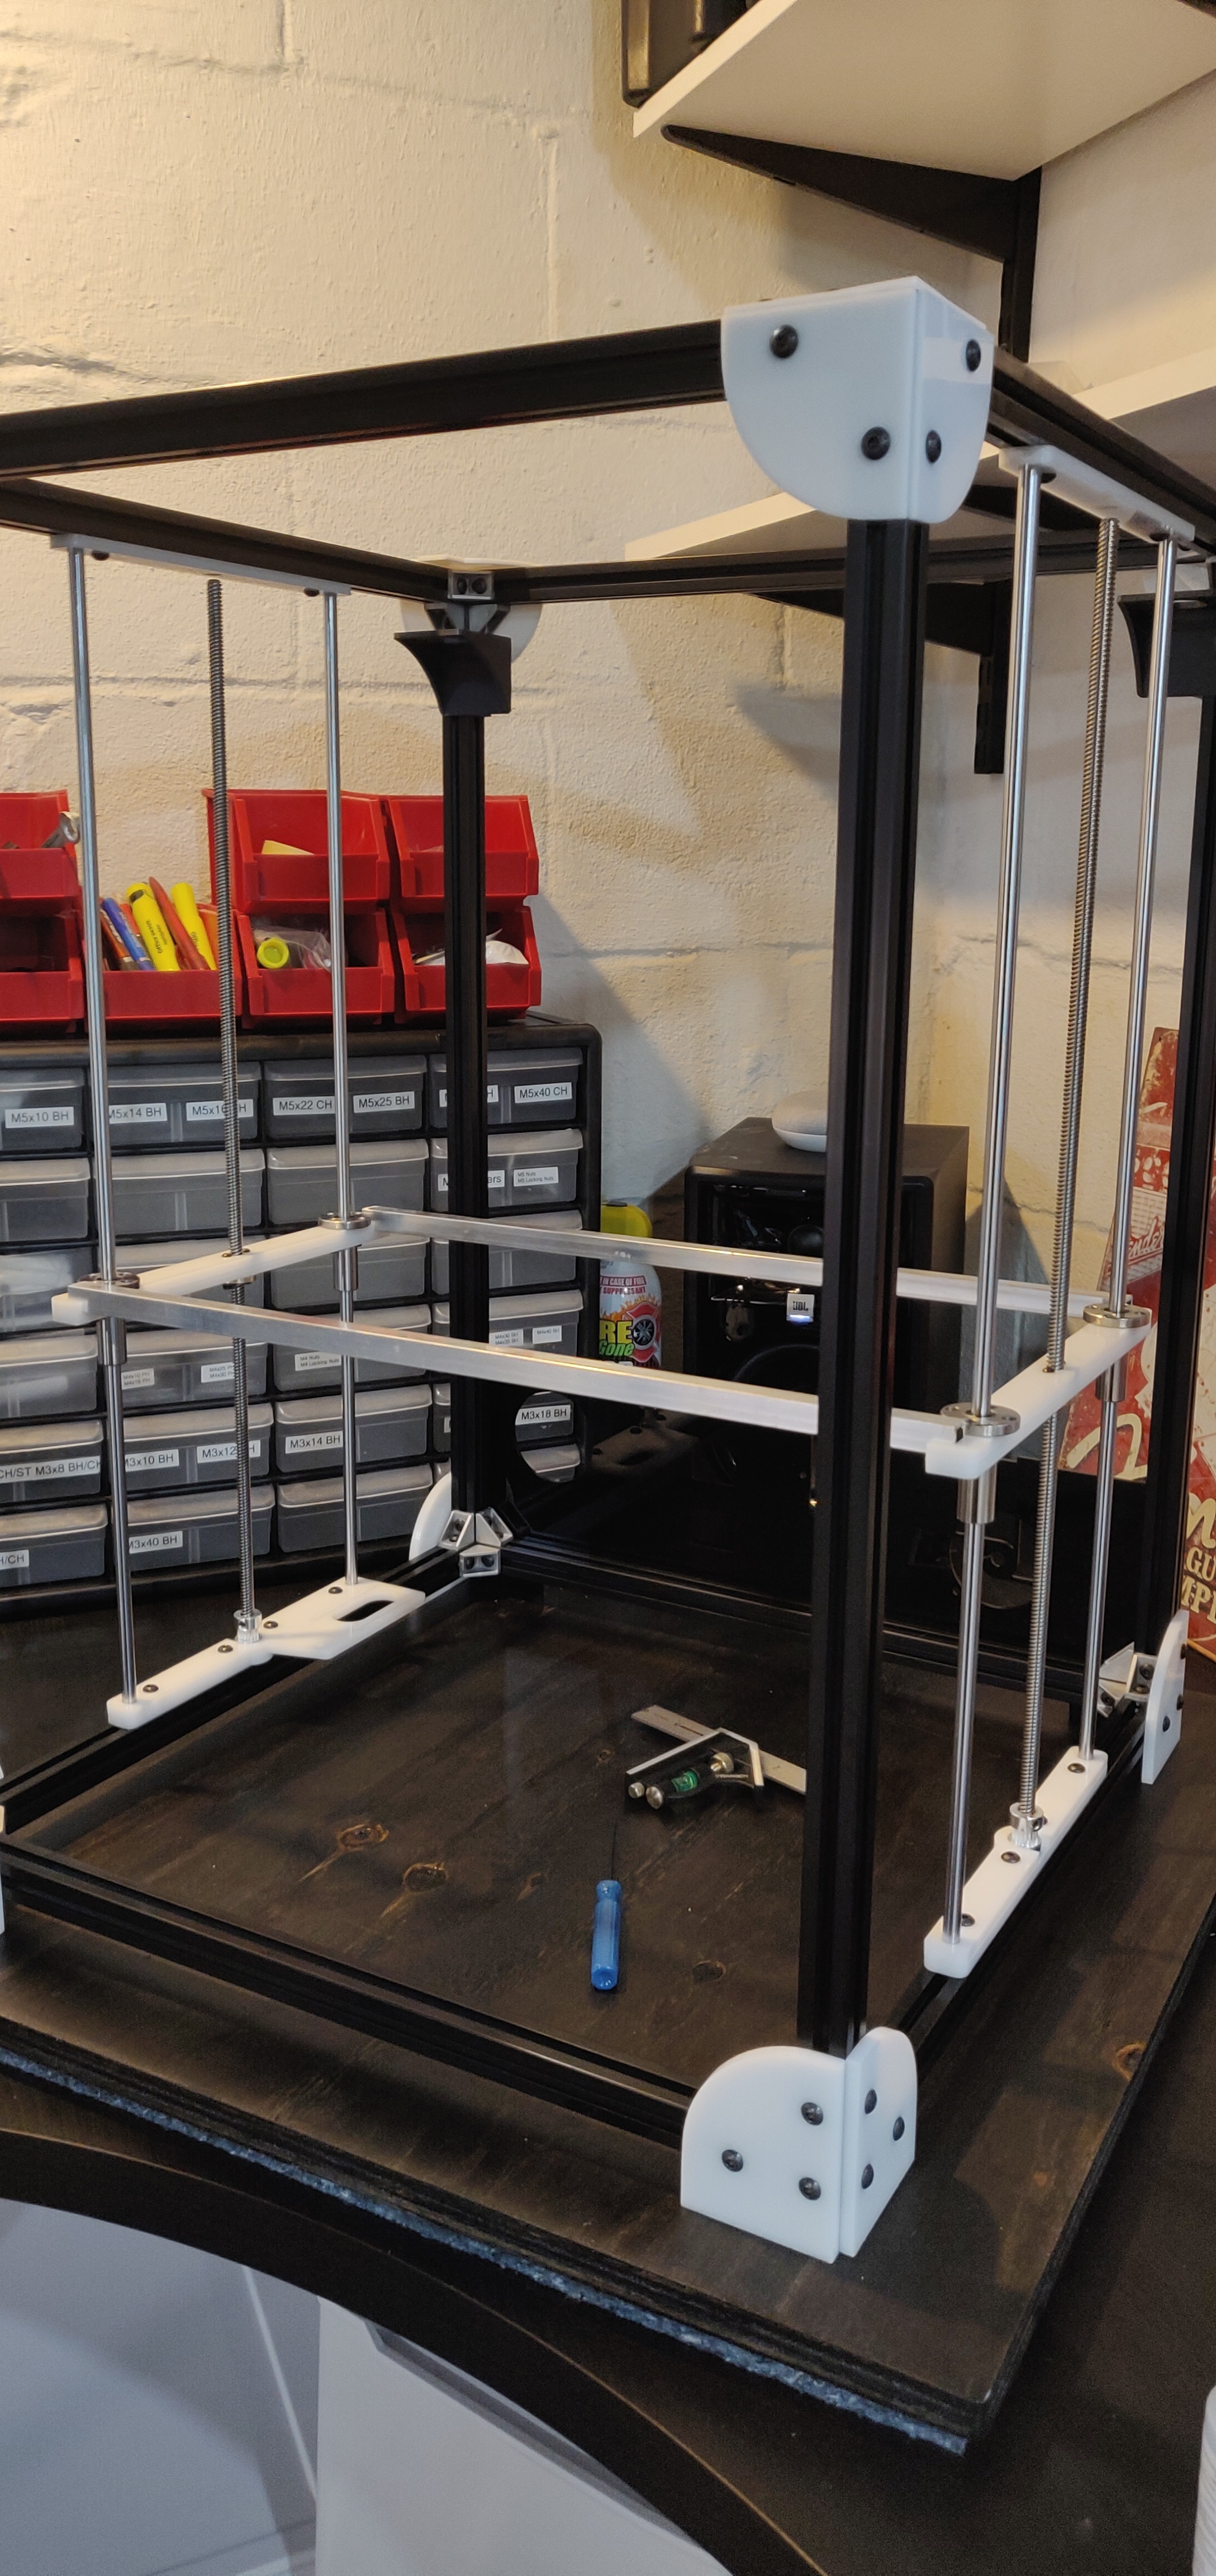
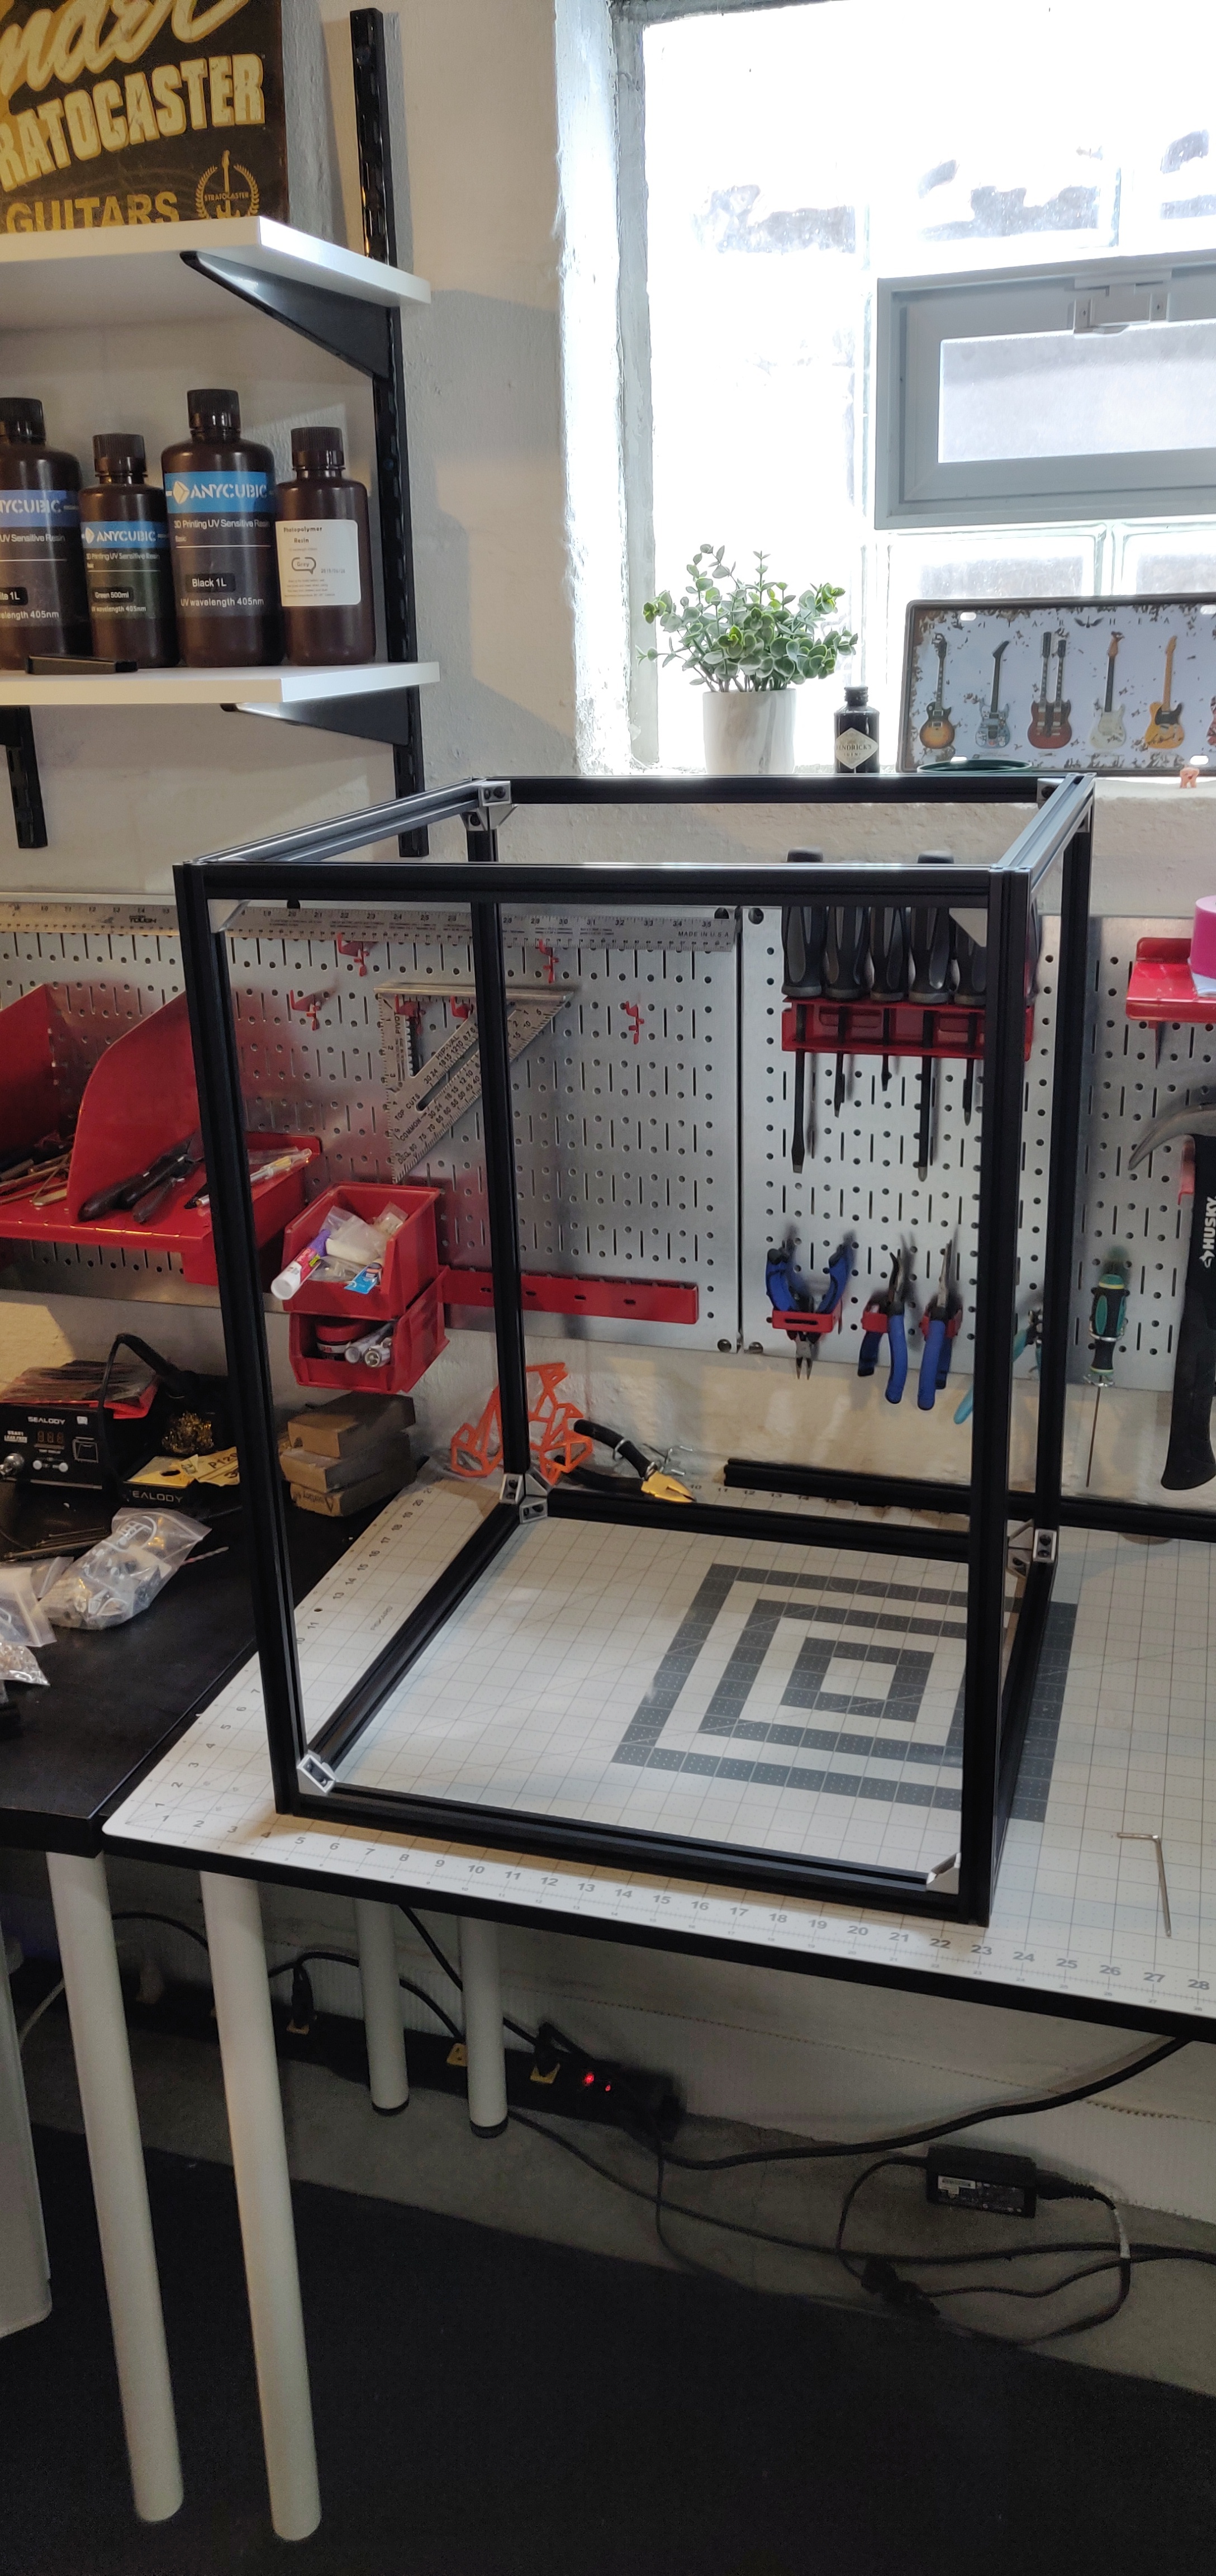
looking good @ferschke  that’s taller than anything I’ve built to date. if the z screws don’t turn freely after the belts are installed, I have a few tricks for that. depending on the dimensions of the parts you got things can be slightly over/under by fractions of a mm.
That looks nice. Those white acrylic parts really pop. Almost like a storm trooper.
Thanks, I will definitely let you know once I’m at the point to think about belts. Hope to get some more done this weekend.
Yeah, your right. It’s really the color scheme of a storm trooper I initially started an order for all black acrylic pieces, but then I saw @stewart’s white GridBot pictures and really liked them, so I changed the order to white.
I just put some primer on those aluminum pipes. Going to paint them too. (Wasn’t able to find any anodized pipes, so I just got raw aluminum). So that hopefully fits in a bit better.
I’m very pleased that everything’s going so smoothly.
2 Likes
I always thought if it as marshmallow chocolate-chip 
1 Like