About to get started with new GridBot v2 build

thinking about this more, it may not work unless you glue or otherwise anchor it to the acrylic.

You are right. I thought about doing that, but I think I found another solution now.
Since the bare screw only had a very slight wobble in the hole but otherwise held on ok, I just applied a couple of layers of PTFE thread sealer tape to the area. Now the screw is very stiff and with the assembly put together again the idler is turning well too.
I’ll keep an eye on this and might revisit the stiffener if it doesn’t hold up otherwise. But it’s looking good.

even better. simplicity.

Ah. The Z idlers. I did have some binding, and then I just decided I didn’t need quite as much tension on the belt. It just needs to stay in its home.

add a spacer between the gear and the bearing so that the gear doesn’t hit the acrylic. also, make sure the threaded rod does not hit the frame extrusion. both cases can cause unwanted binding.

I redid all the idlers and they all seem to be fine now and ready to go.
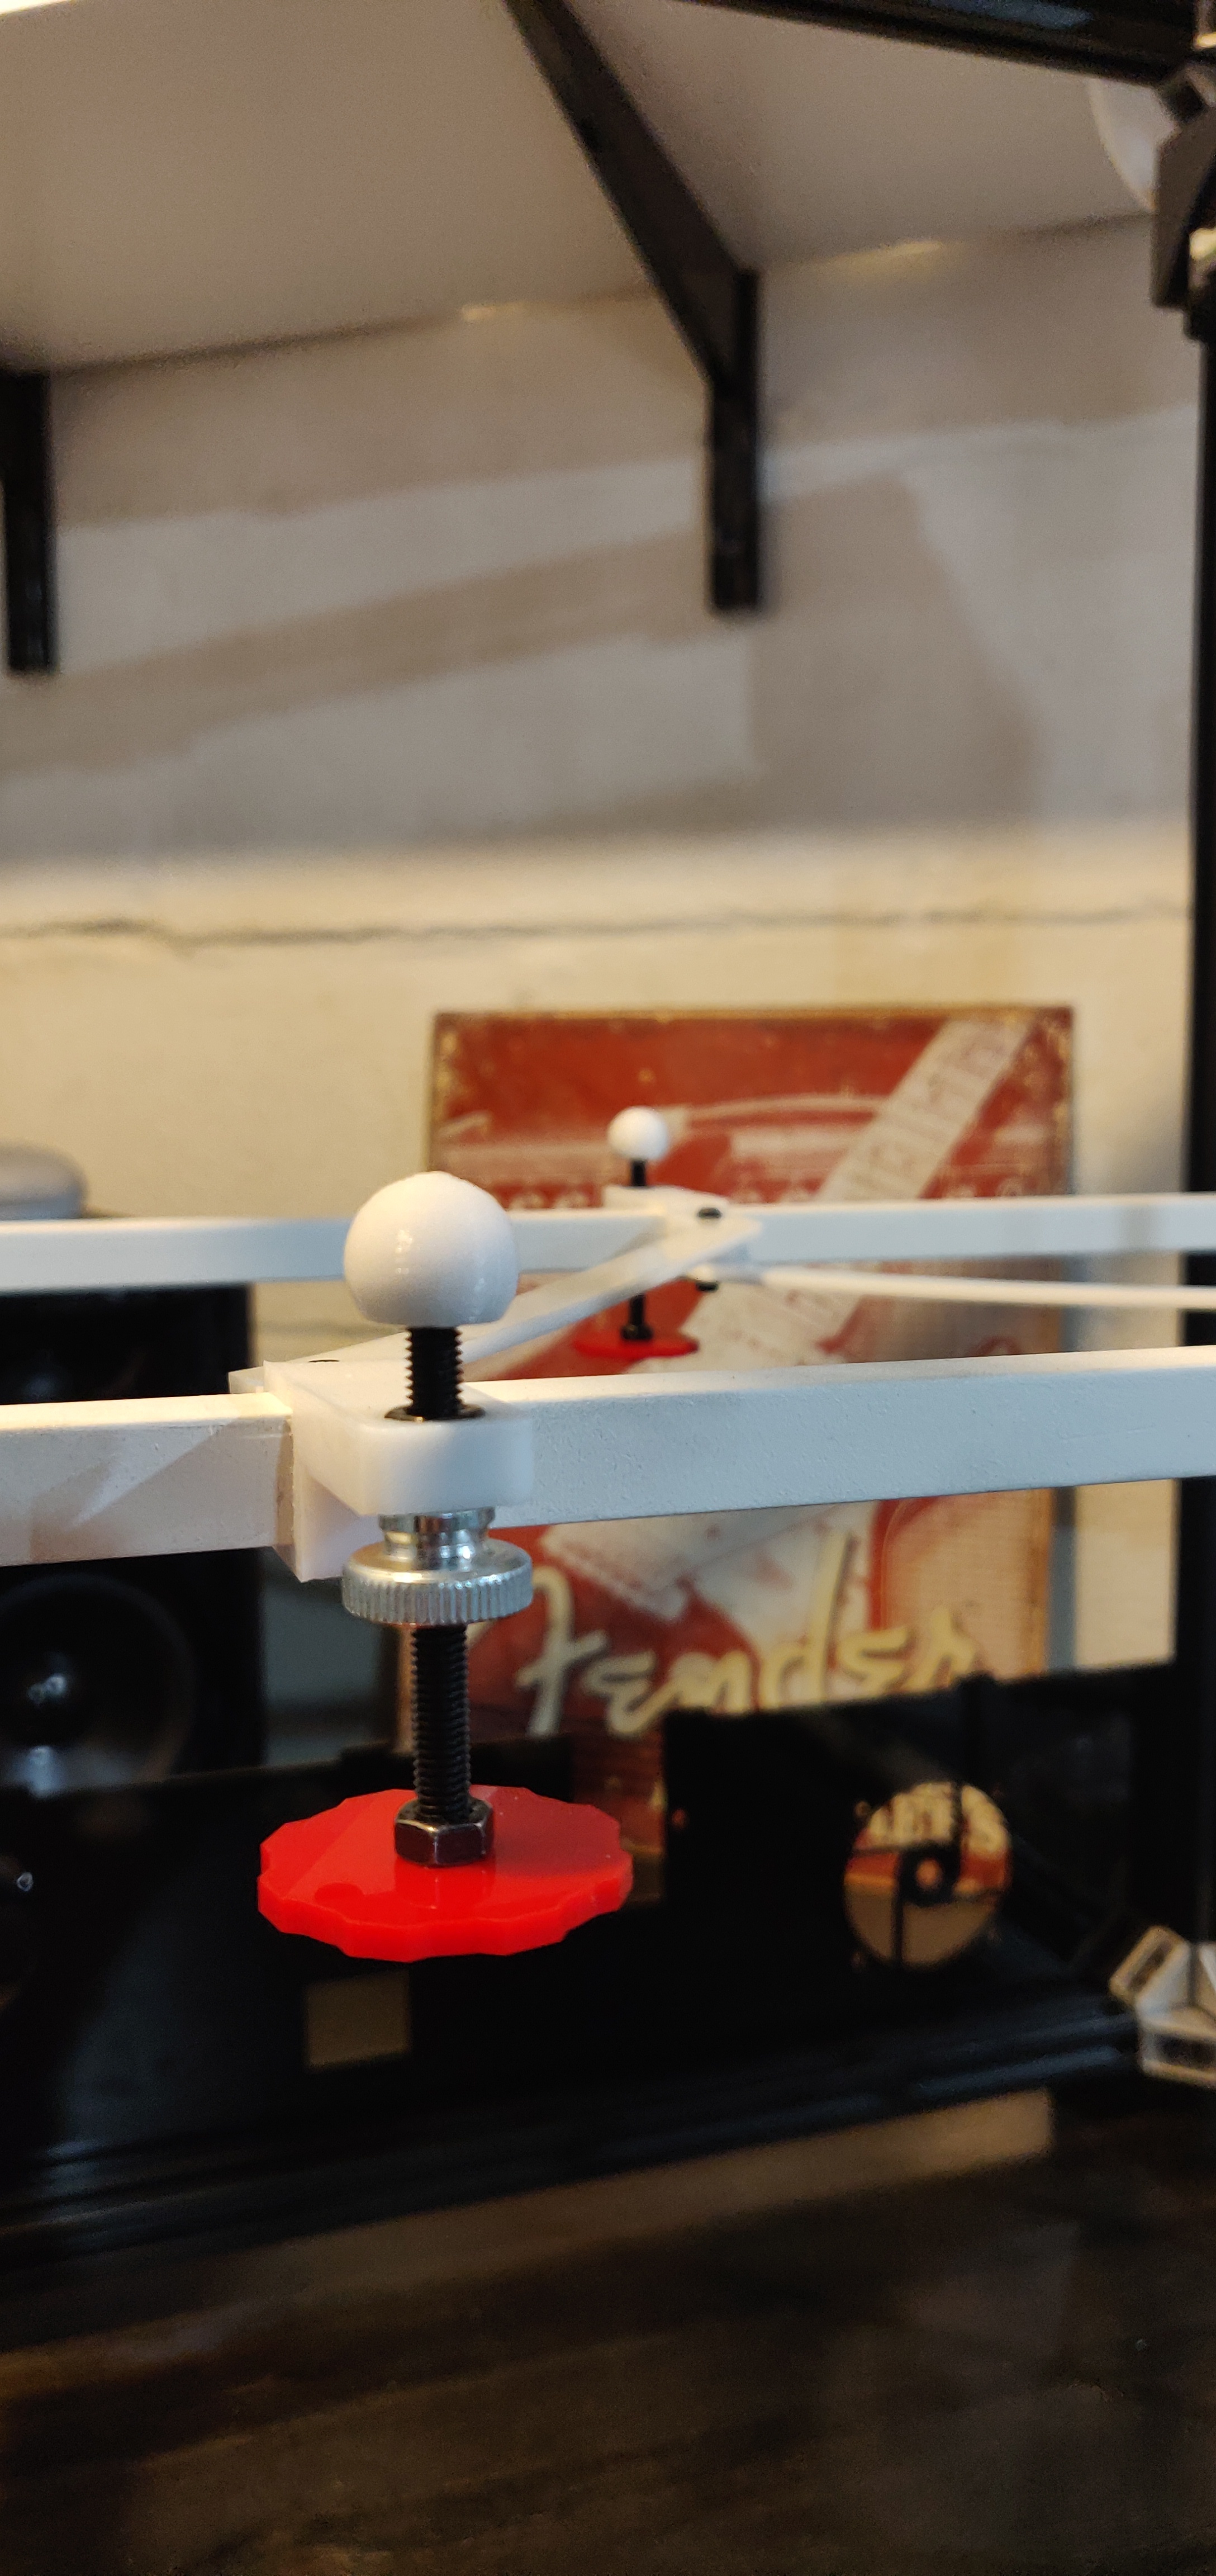
I also reprinted the level brackets because the others cracked slightly when I put the nuts in. I used white this time to match the rest of the carriage.
I added some additional thumb wheels to the level screws so I can easily lock them in place (see photo)

1 Like

nice additions. I may add the thumb screws (or something like it) to the CAD model.

Only a little bit of progress this weekend.

1 Like

resin printed parts looking good

Hi guys!
I started ordering some parts for this build and hope to join you soon)
A small Q: is there any reason to pay a few extra $$ for the SKR v1.4 board?

SKR 1.3 should be fine.
1.4 gives you a few more interfaces for motors, LED, Wifi module etc that you won’t necessarily need. And the 1.4 Turbo has a slightly faster processor.

Here’s a comparison

Both not necessary, but since the price difference was marginal, I got the 1.4 Turbo

I haven’t posted any updates lately since I was busy with fixed around the house.
I’m currently working on the GridBot wiring and I’m doing a bunch of crimping. Not my favorite, but it has to be done. Hope to be able to make some more progress soon.

Wiring isn’t the hardest part of the build. But it is easily the most tedious.

I think you should just pick the one you want. They will all work, if you can configure them. If you choose the skr 1.3, it will be slightly easier, because Stewart has preconfigured firmware for it.

I don’t expect huge differences in firmware between 1.3 and 1.4 - but I might be wrong.

Thank you for your advice!
Preconfigured firmware is in this line?
define MOTHERBOARD BOARD_BIGTREE_SKR_V1_3

Or there some other lines that need to be configured for 1.3 to 1.4 replacement?

these are the files I updated for the 1.3 build. you could diff them with the current marlin codebase to see what was changed.

1 Like

Sorry for being unclear in my post. I was speaking about the difference in SKR v1.3 and v1.4 configuration.

hi, im intending on building the gridbot v2 3d printer as a college project and i had some questions before i start. 1. am i able to use v slot 2020 extrusion with 6mm channel instead of the t slot in the build, if so would it affect any parts in the build 2. for the printed parts what type of filament would you recommend 3. have you updated the CAD to include the 3d printed parts for squaring the axis of the extruder rail 4. how many t nuts are required and are they all m5 only 5. would you recommend i mill the edges of the t slot/v slot for a nice flush fit 6. what size ribbon cable would i need for the camera, i can only get 50cm, 100cm or 200cm 7. what voltage heated bed would you recommend 12 or 24

Hi,
this is probably best answered by @stewart, but here’s what I have to add

  1. I don’t see why not. Either should work fine
  2. I guess you can just use whatever you feel comfortable with. I followed @stewart’s recommendation and used Ziro Carbon Fiber PLA. Worked great. Some parts i decided to SLA print instead
  3. It’s in the CAD and worked well for me. Just look for hidden parts
  4. Not sure, but probably just get one or 2 packs of 100. I think most are M5, but for the enclosure you might need a couple of M3
  5. It depends on the quality of your profiles. I ordered mine at Misumi and they worked out well without any additional milling.
  6. Depends a little on your cable management. 100cm should be sufficient. 200 will be a bit long.
  7. I’d recommend 24v