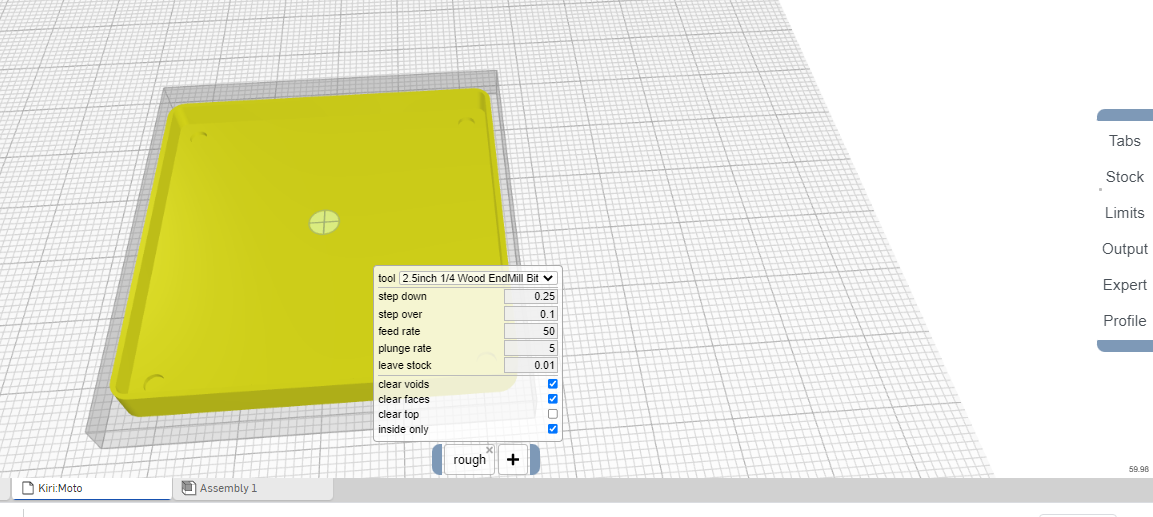
After the first rough cut I want to do a finishing pass on the inside/ cavity of the part.
I have rough out leaving 0.010 inches. It is roughing an inside cavity, flat bottom, flat sides.
How would I get it to do a finish pass and not repeat the entire rough out since it is already done?
Also. It did not leave 0.010 inches of material on the bottom roughing. It did the entire 0.375 inches, not 0.365 inches. Unable to tell if it left material on the sides. Why?
roughing only leaves material in the XY plane. if you want to prevent roughing from cutting through the material, set a z bottom under the limits menu.
at present, operations are not aware of each other. they do not know how much material remains after another operation. the intent of roughing is to be followed by outline and/or contour passes.
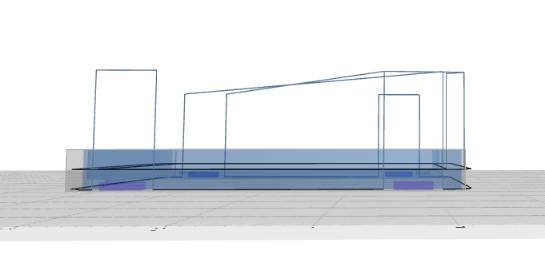
Here is an example of using outline to complete the rough and cut the part out. It only makes one pass on the inside, 1/4" Z depth, It does not do the inside next Z depth of1/8".
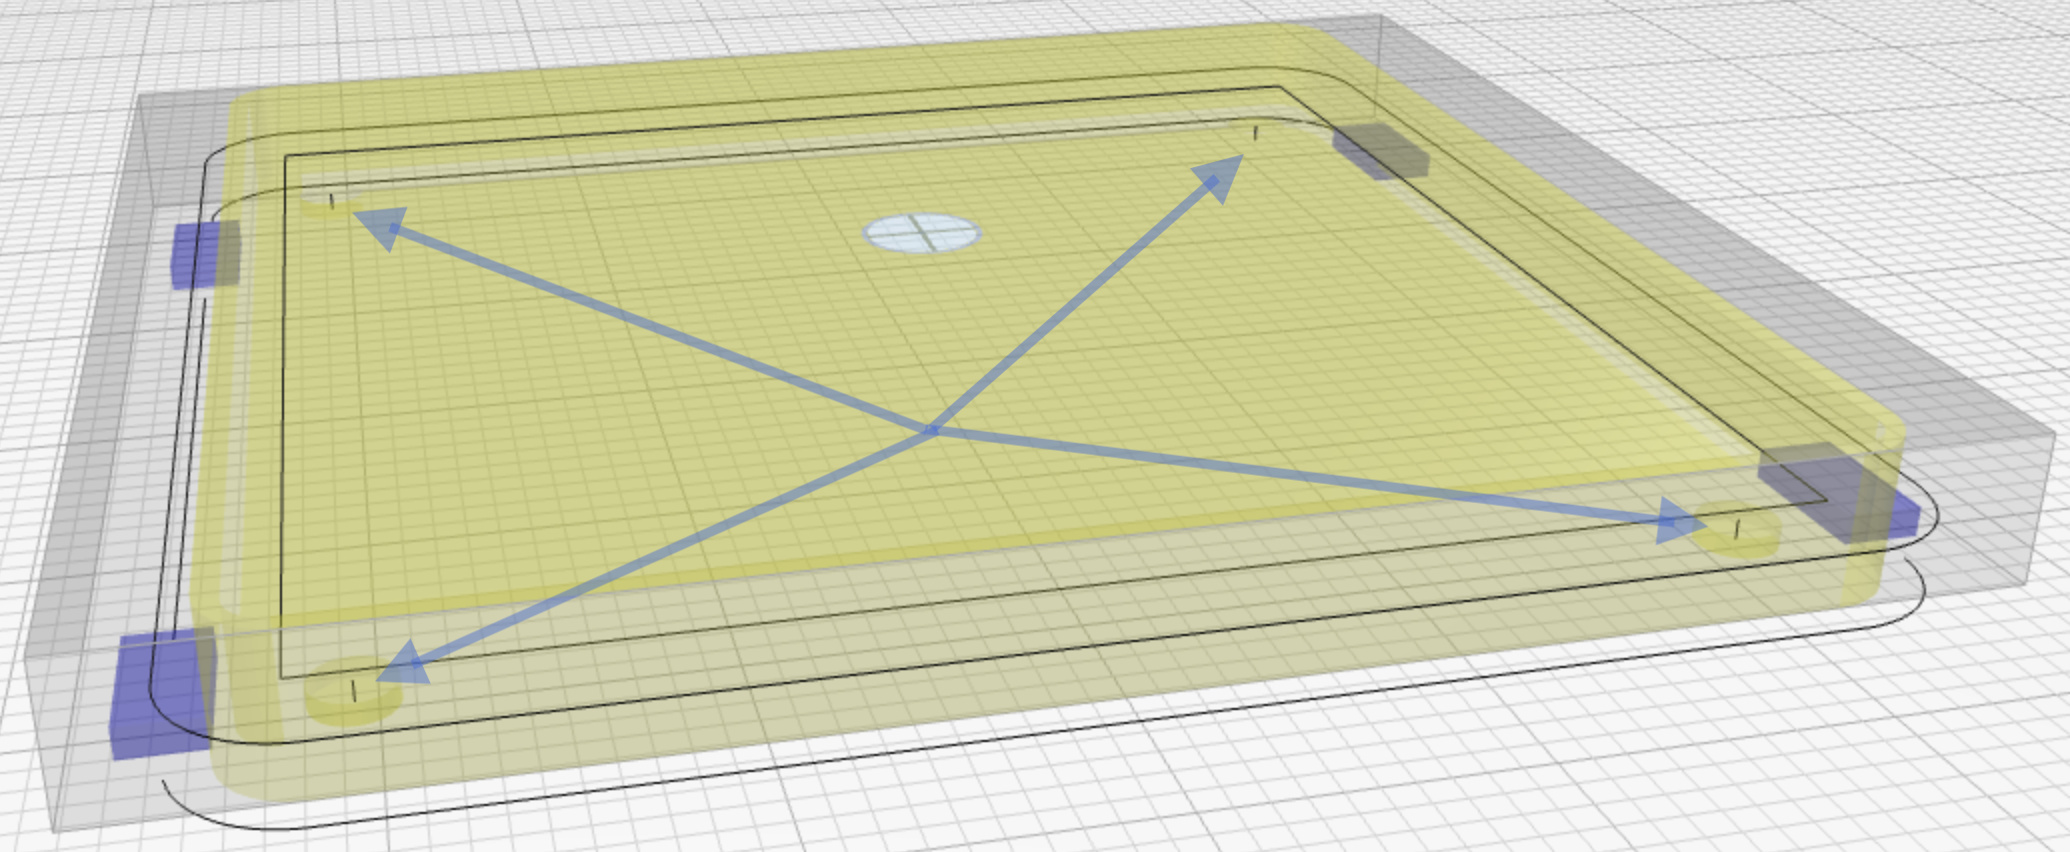
are you talking about the interior pocket/holes? those appear to be the exact size of the endmill. you would pick those up by adding a drilling operation with the same tool.
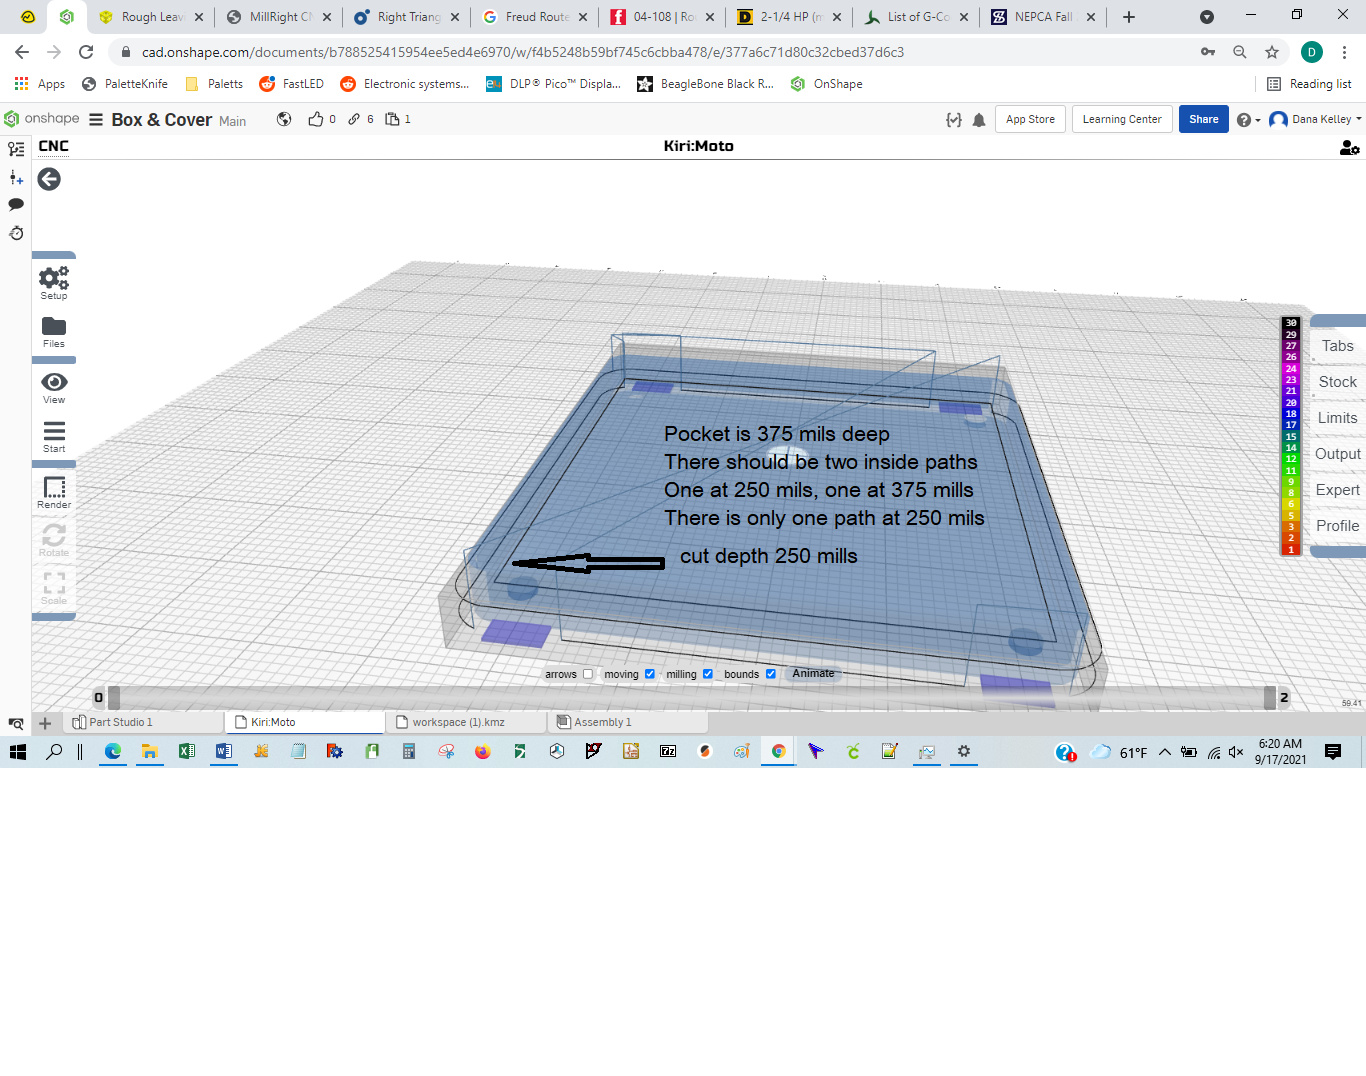
@stewart I remember now… there should have been two inside passes. The Z cut depth is 250 mils. The pocket is 375 mils. There ought to be a second inside pass to finish cutting out the interior perimeter to 375 mils.
at present, outline does not look for flat faces to match (which is an option for roughing). but it’s probably not hard to add. so I’ll put it on the list and look into it.
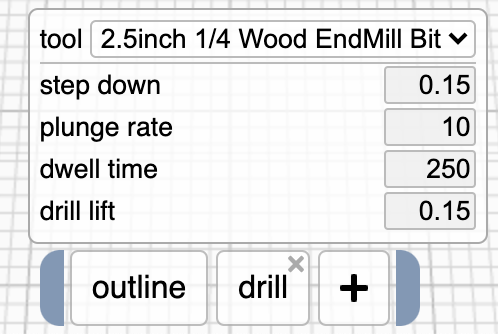
I changed the step down to 125mils from 250 mils for the outline inside option and now it makes three inside passes which equals the 375 mils inside pocket depth. Success. But only for this particular pocket depth. If the pocket was 350 mils it would stop at 250 mils
Why this is needed… Assume the rough left 10 mills on the inside pocket walls. How would doing a inside outline be done to finish the inside surfaces? A second rough repeats the entire pocket paths not just an outline. Wasting lots of time. Not a good option.
I did succeed by using the outline inside selection setting the cut depth divided by three. I did the same for the tabs. The tab is now 125 mils thick and not 250 mils thick. Setting it to 62.5 mil cut depth would take too long for the desired tab thickness.
I realized there is a simpler way to nearly achieve the desired goals until future enhancements aid in the process.
Note: When roughing out a pocket like in the above image the first cut was aggressive. The tool path started furthest from the part center and worked around the inside edge then continues toward the center. Step Down set at 250 mils with a feed rate of 50 inches per minute, with a 10% step over. The issue is the first cut uses 100% of the bit diameter at 250 mil step down, 50 inches per minute feed rate which is too aggressive. Then it continues with a 10% step over. By starting on the pocket perimeter it is removing 100% of the bit diameter. If it were to start on the inside edge it would drill down and go right to 10% step over action.
Another solution would be to have the rough first inside perimeter cut use a set fraction of the step down. In the above case I would set the primary step down at 365 mils leaving 10 mills on the bottom and sides. And the inside Perimeter step down to a fraction of the primary step down, say 33%. By doing this the first cut will be less aggressive for the first perimeter cut. This would be quicker and result in a better finish.
With the above experience this is how I’ll set up the milling process
Step 1: Outline-inside only, step down 122 mils ( leaving 10 mils on the bottom, taking 3 passes )
Step 2: Rough, step down 365 mils, (not possible to leave 10 mils on the inside walls due to step 1 )
Step 3: Rough, step down 375 mils, leaving 0 mils on the bottom, finer finish
Step 4: Outline-outside only, step down 125 mils (this will leave a 125 mil tab thickness)
Step 5: Outline-outside only, step down = (part thickness - 63 mils), leaving 1/16 tab thickness
Another enhancement when tabs are used is to leave 10 mils on the outside perimeter cut. Then a second pass would take away the 10 mils resulting in a finer finish.
I have on occasion returned to the problem of the cuts on each layer where the tool is fully engaged with the material. I have not been able to determine a simple and reliable algorithm that can slow the mill in just those areas. As far as I can tell, it requires a fair amount of memory and computation (akin to the animation feature) to track what material is removed. Having said that, this is on my todo list.
In the short term, making Outline better at matching step down to detected faces (like roughing) is easier.